Enable Webhooks
Activate webhooks in your Developer settings to start receiving real-time event notifications.
Add Endpoint
Register your webhook endpoint and select which events you want to receive.
Test & Monitor
Send test events, view delivery attempts, and monitor webhook status in the dashboard.
Enabling Webhooks
1
Enable Developer API
Go to the Developer page in your Roastify dashboard and enable the Developer API.
2
Enable Webhooks
Once the Developer API is enabled, click Enable Webhooks to access the webhook portal.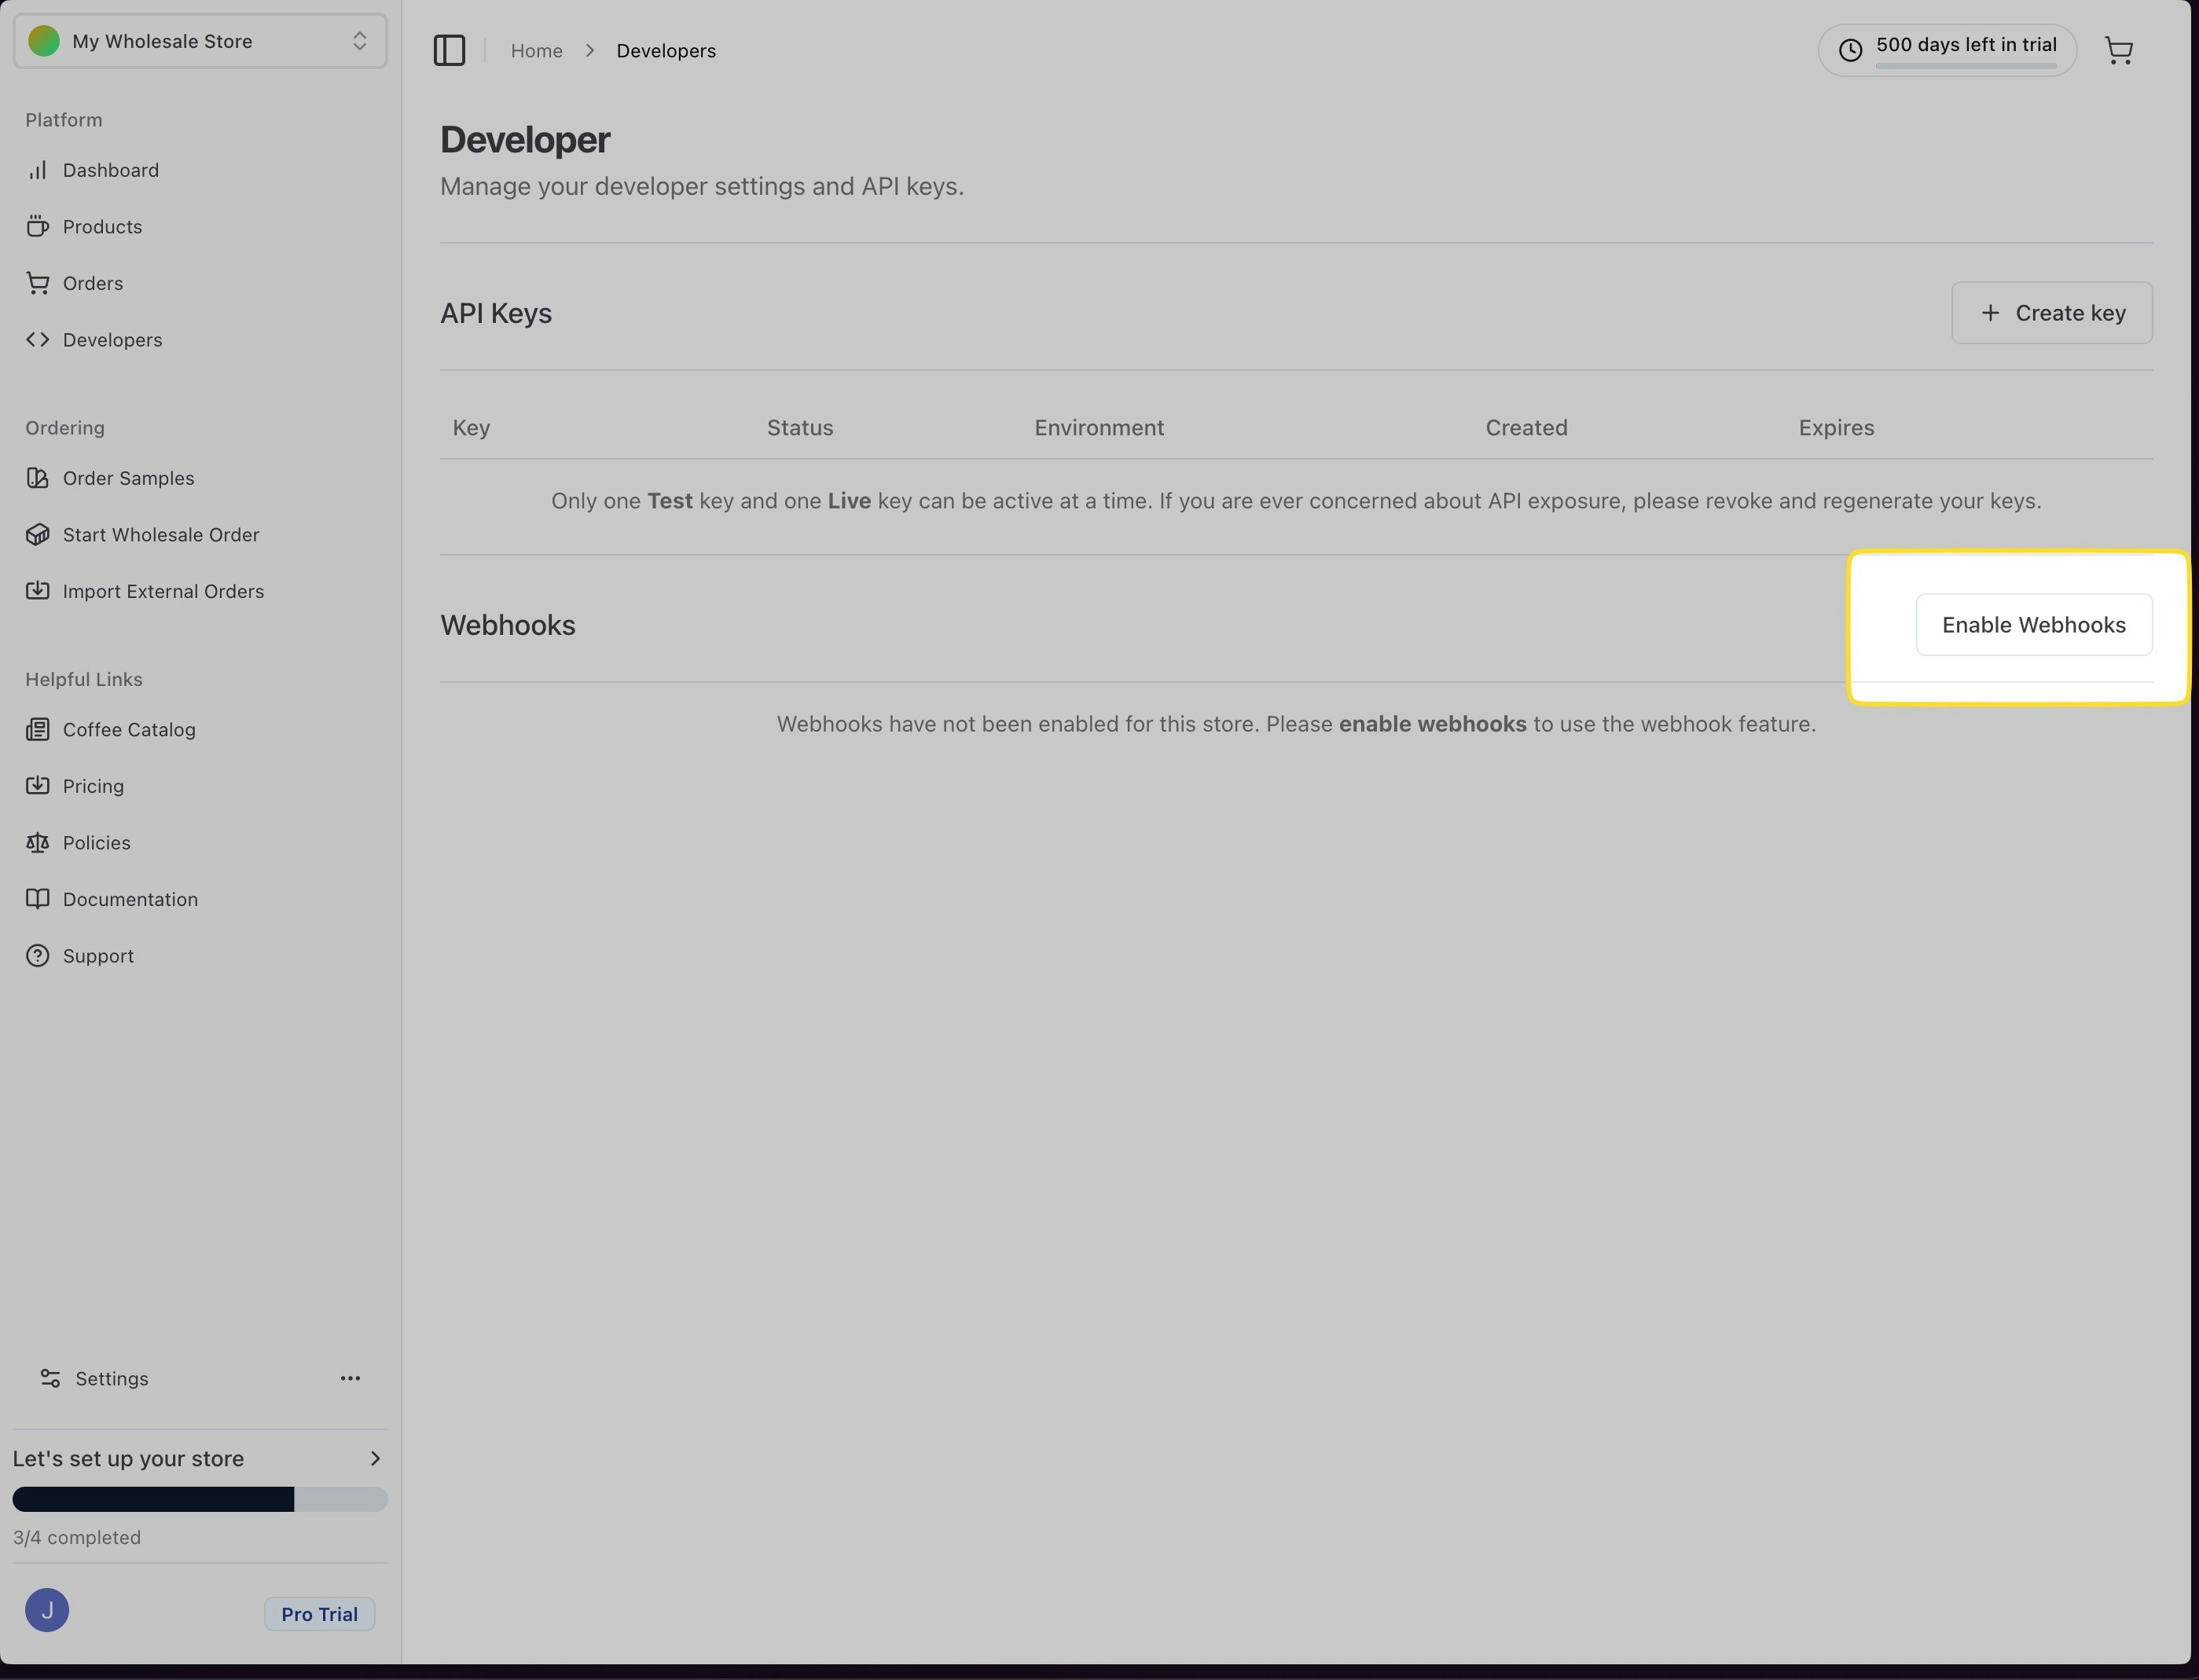
3
Create Endpoint
In the webhook portal, click New Endpoint and enter your endpoint URL. Select the event types you want to receive.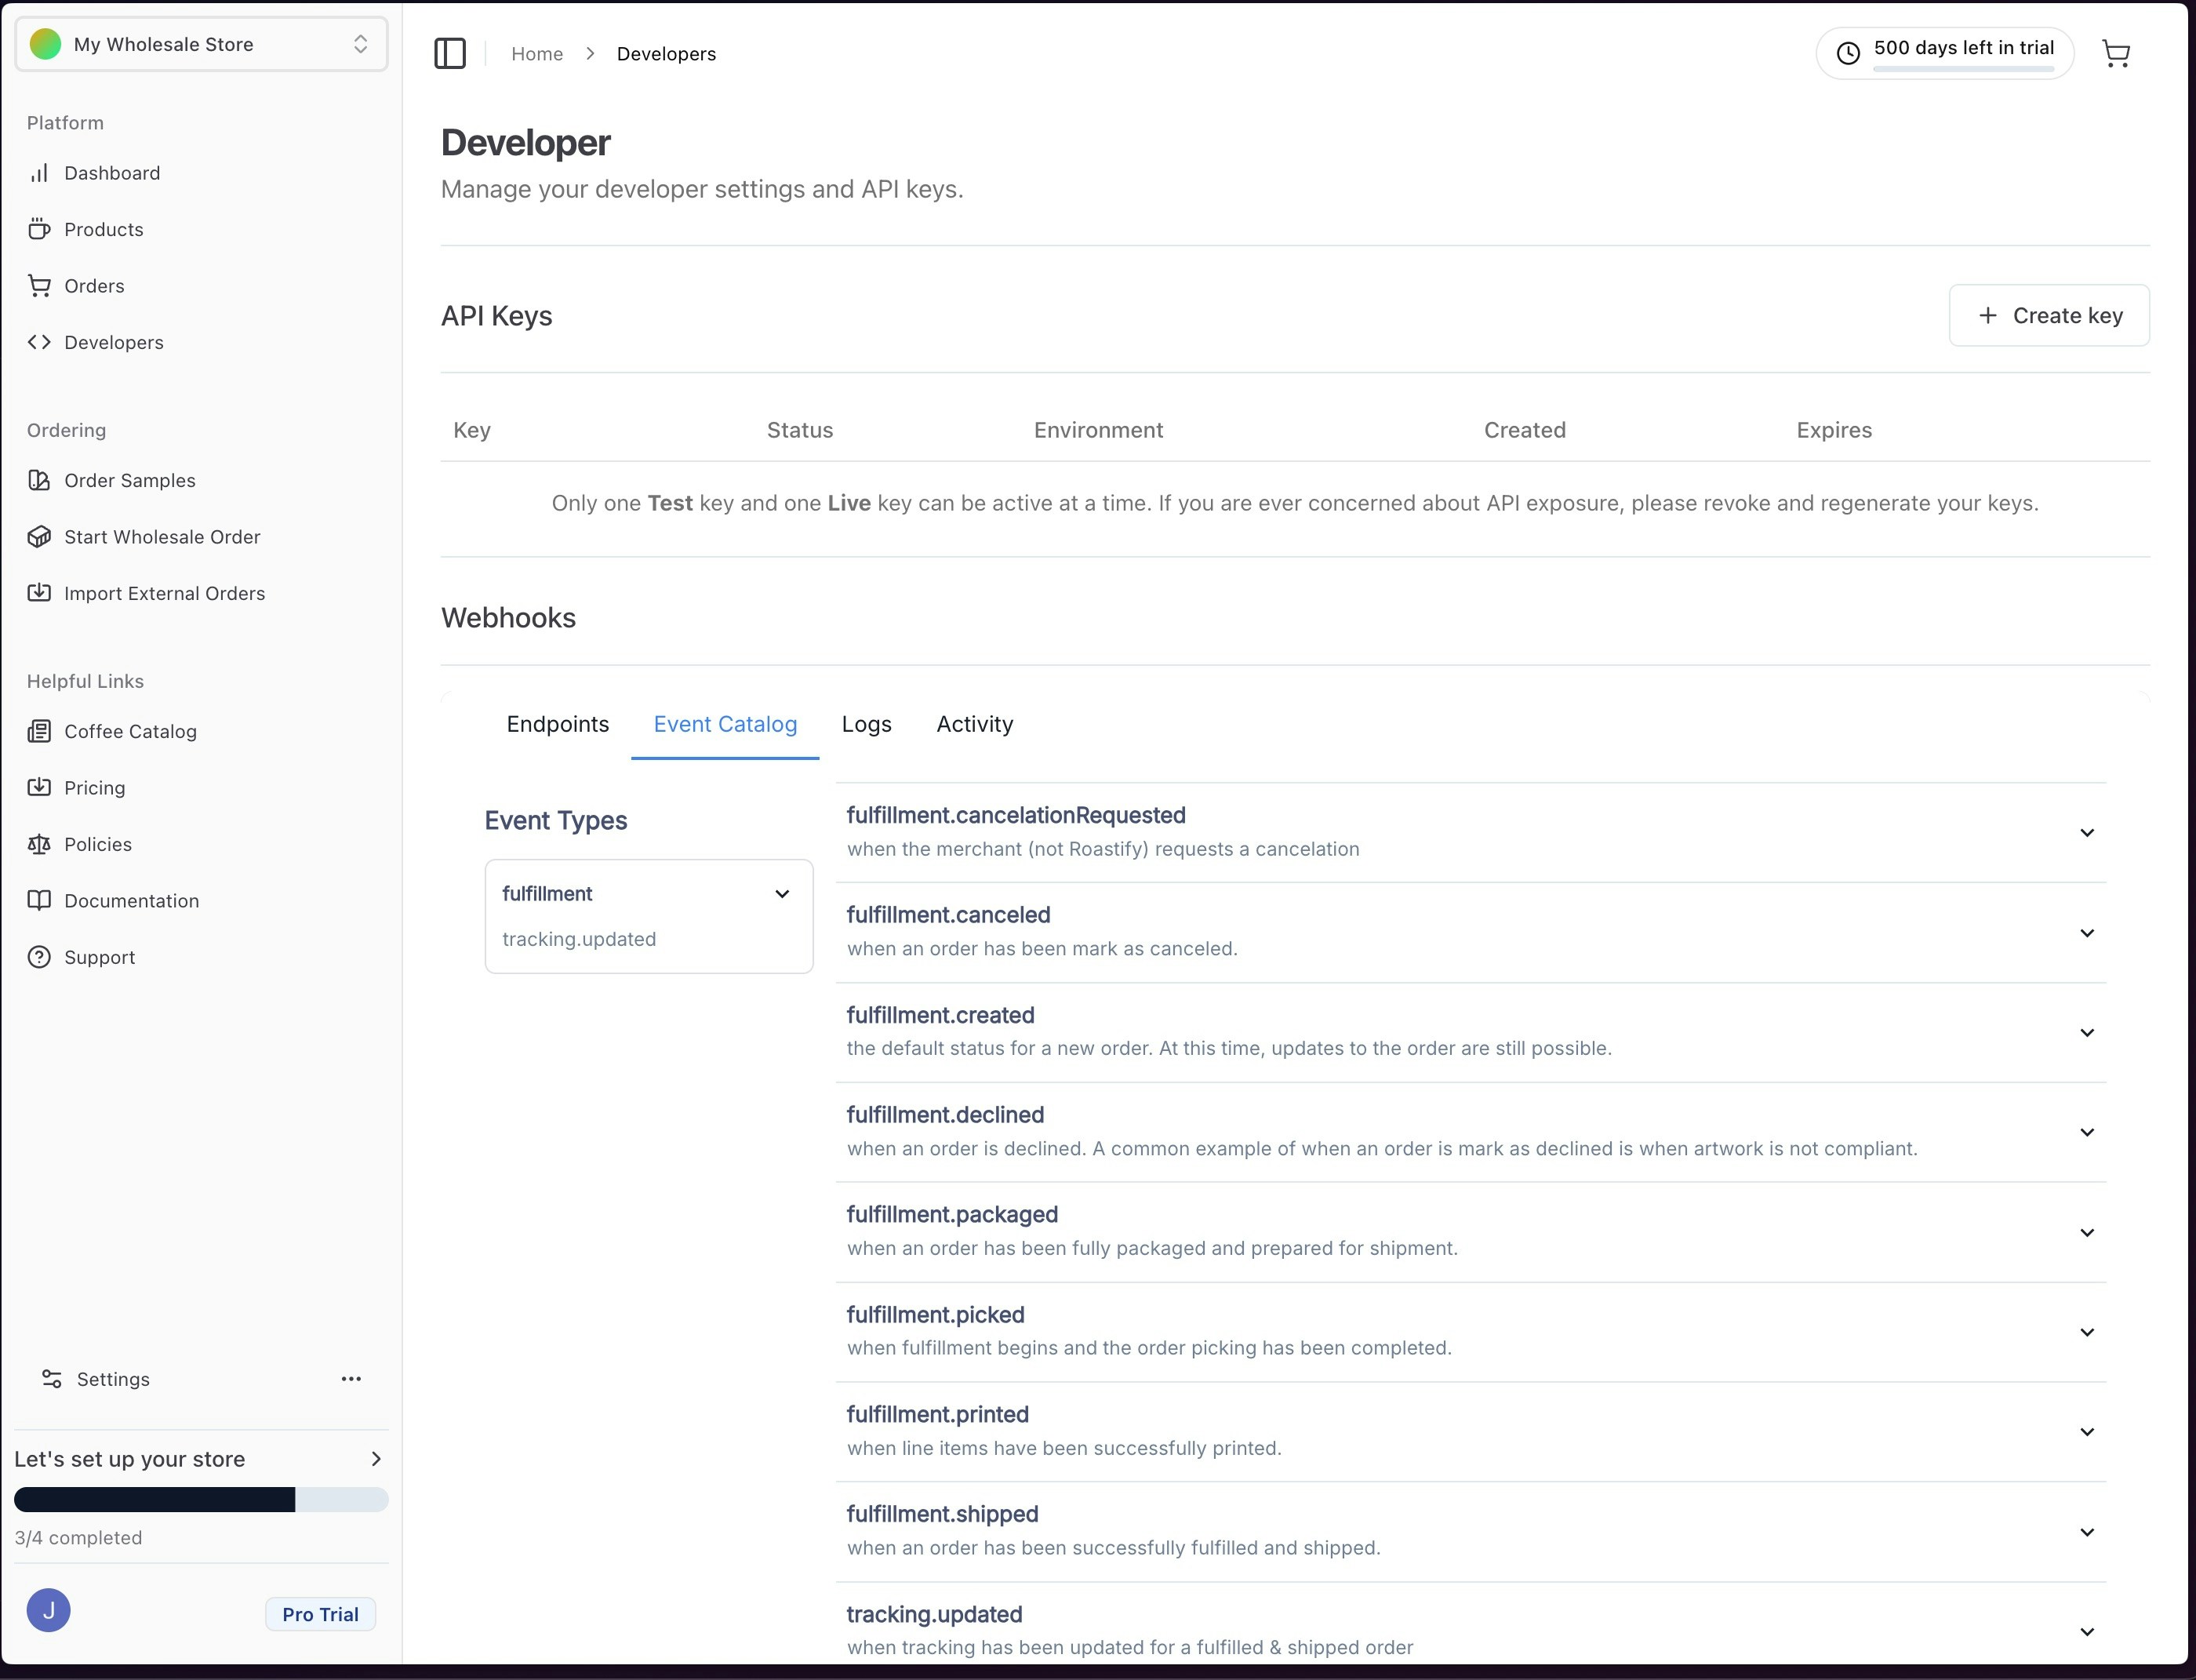
Adding & Testing Endpoints
1
Add Your Endpoint
Enter your endpoint URL and select the events you want to listen for. If you don’t specify any, you’ll receive all events by default.
2
Use Svix Play (Optional)
If your endpoint isn’t ready, use a temporary Svix Play URL to inspect incoming webhooks before going live.
3
Test Delivery
Use the Testing tab in the dashboard to send sample events and verify your endpoint is working. You can view payloads, delivery attempts, and status for each test.
Webhook Events
Roastify sends the following webhook events related to order fulfillment and tracking:| Event Type | Description |
|---|---|
| fulfillment.created | Sent when a fulfillment is created |
| fulfillment.canceled | Sent when a fulfillment is canceled |
| fulfillment.cancelation_requested | Sent when a fulfillment cancelation is requested |
| fulfillment.declined | Sent when a fulfillment is declined |
| fulfillment.packaged | Sent when a fulfillment is packaged |
| fulfillment.picked | Sent when a fulfillment is picked |
| fulfillment.printed | Sent when a fulfillment is printed |
| fulfillment.shipped | Sent when a fulfillment is shipped |
| tracking.updated | Sent when tracking information is updated |
fulfillment.created
fulfillment.canceled
fulfillment.cancelation_requested
fulfillment.declined
fulfillment.packaged
fulfillment.picked
fulfillment.printed
fulfillment.shipped
tracking.updated
Signature Verification
1
Get Your Secret
Each endpoint has a unique secret key. Find it in the endpoint details in the dashboard.
2
Verify Signature
Use the official Svix libraries to verify the signature and timestamp of incoming webhooks. Always use the raw request body for verification.
3
Sample Code (JavaScript)
Signature Verification Example
Retry Schedule
Webhook deliveries are retried automatically using an exponential backoff schedule:
- Immediately
- 5 seconds
- 5 minutes
- 30 minutes
- 2 hours
- 5 hours
- 10 hours (twice)
Troubleshooting & Recovery
Common issues:
For more tips, see the Svix troubleshooting guide.
- Not using the raw payload body for signature verification
- Using the wrong secret key (keys are unique per endpoint)
- Sending the wrong HTTP response codes (must be 2xx for success)
- Response timing out (must respond within 15 seconds)
For more tips, see the Svix troubleshooting guide.