Quickstart
Get up and running with the Roastify API - enable access, create API keys, and make your first request
This tutorial walks you through the complete process of setting up the Roastify Developer API, generating API keys, making your first API request, and configuring webhooks to receive real-time event notifications.
Developer API access is included with any paid plan (Base or Pro) and requires a valid payment method.
Overview
The Roastify API allows you to programmatically:
- Query your product catalog
- Create and manage orders
- Receive real-time updates via webhooks when orders are processed, shipped, etc.
API Keys
Authenticate your API requests with Test or Live keys
Webhooks
Receive real-time POST notifications for order events
Accessing the Developer Page
Open the Connections Menu
In the left sidebar, click on Connections to expand the menu.
Click Developers
Select Developers from the expanded menu to access the Developer settings page.
Enabling API Access
When a paid member first visits the Developers page, a banner prompts them to enable API access.
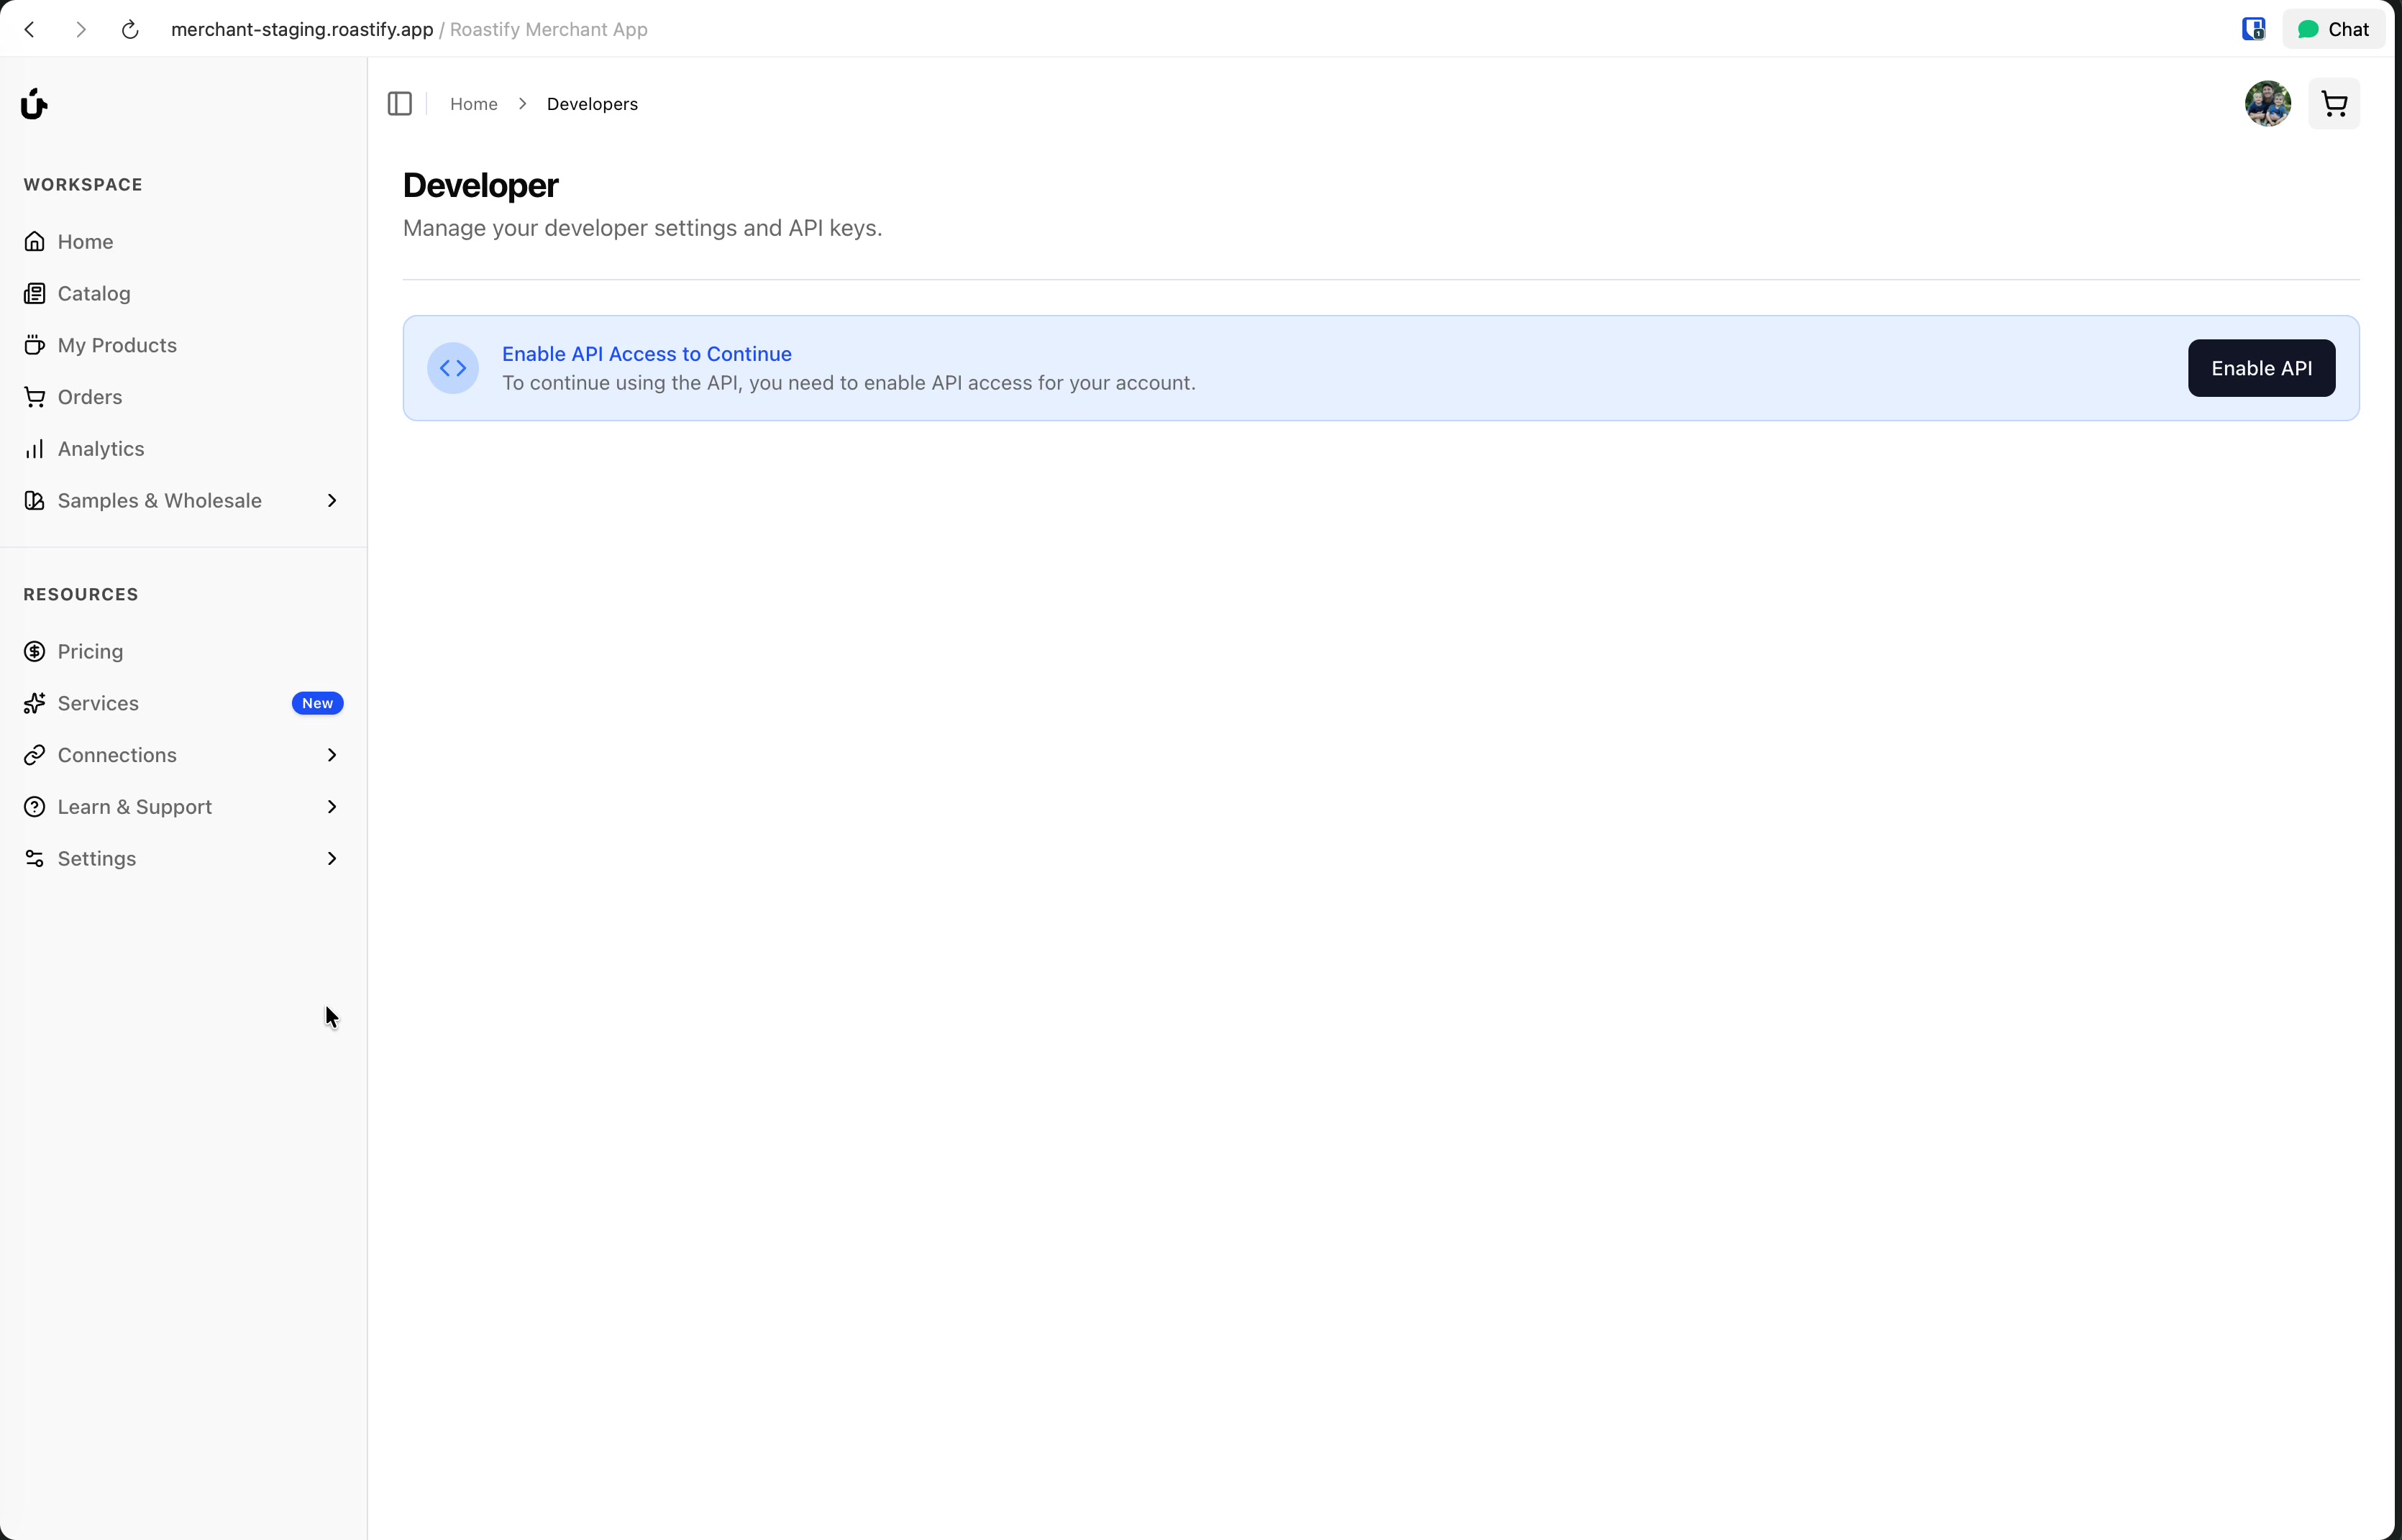
Click Enable API
Click the Enable API button to activate API access for your account.
Wait for Page to Load
After enabling, the page will refresh and display two main sections: API Keys and Webhooks.
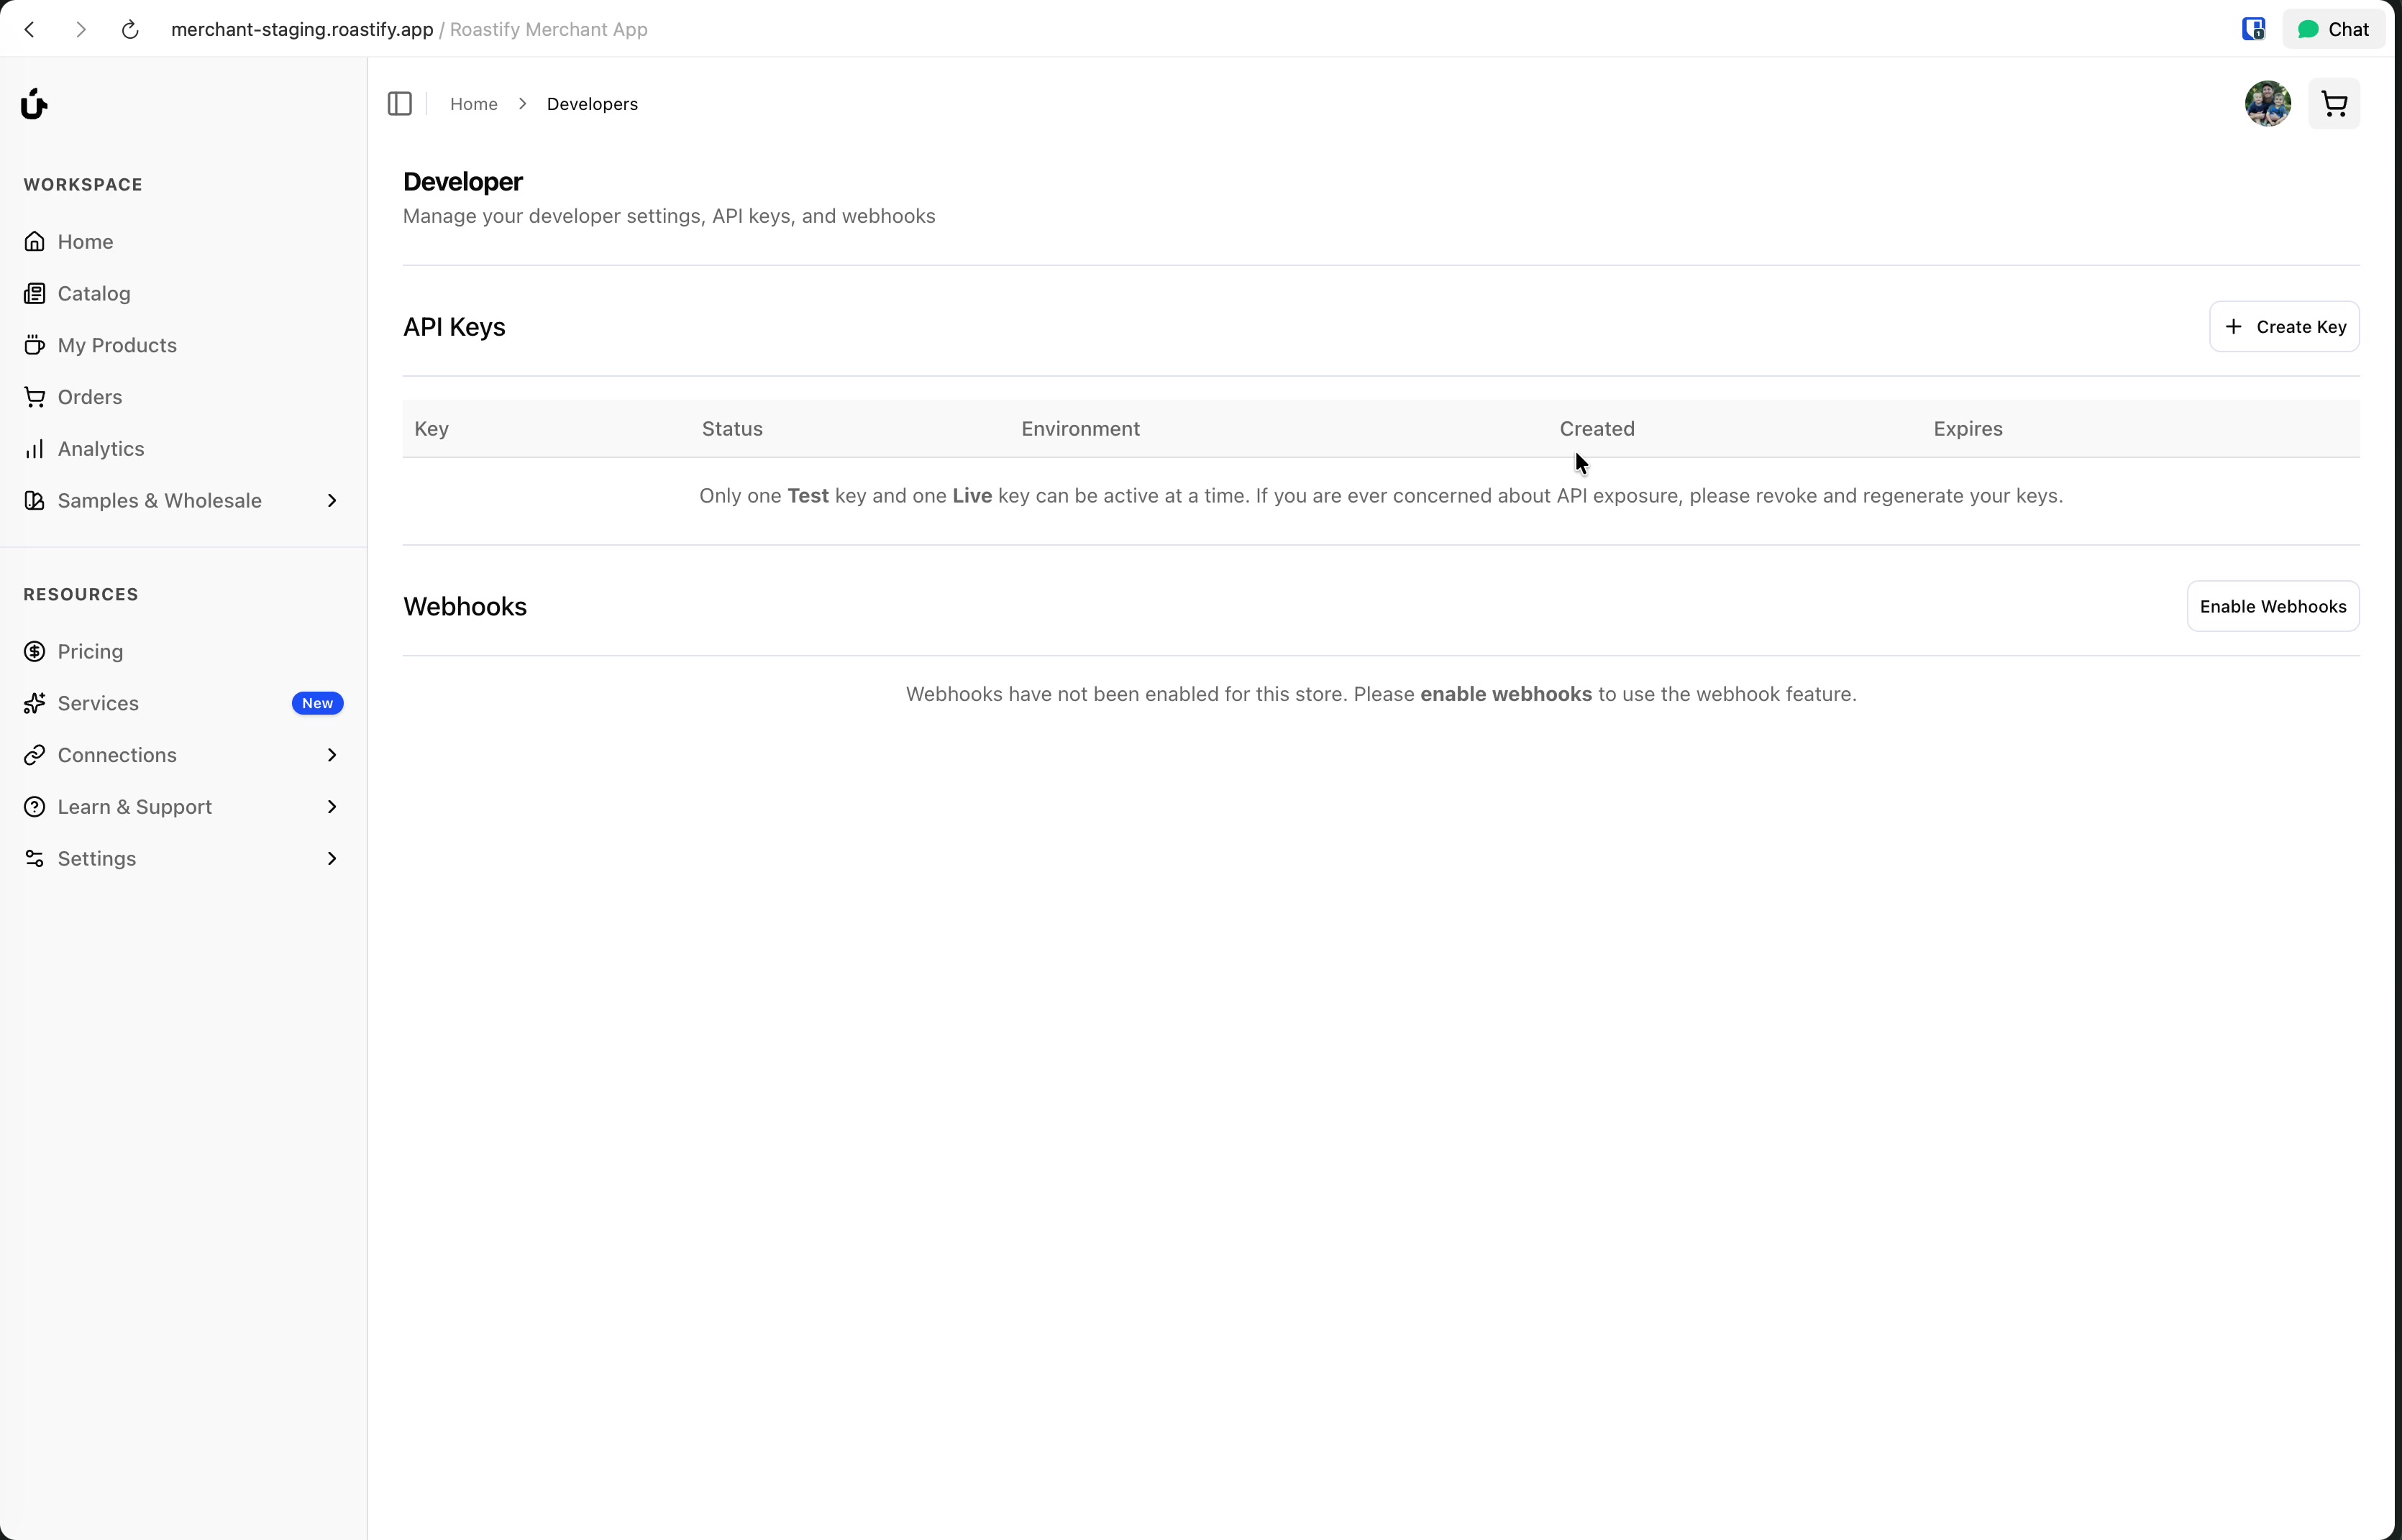
Creating an API Key
Once API access is enabled, you can create API keys to authenticate your requests.
Payment Method Required: Before you can create an API key, you must have a valid payment method on file. If prompted, go to Settings > Billing to add your payment method first.
Understanding Key Types
Only one Test key and one Live key can be active at a time. If you're concerned about API key exposure, you can revoke a key and regenerate a new one at any time.
| Environment | Purpose | Orders |
|---|---|---|
| Test | Sandbox environment for development | Test orders only - not fulfilled |
| Live | Production environment | Real orders - will be fulfilled |
The Test environment is your sandbox. You can create test orders, verify your integration is working correctly, and do all of this without worrying about real orders being fulfilled. It's a consequence-free way to develop and test your application.
The Live environment is for production. Orders created with a Live key are real orders that will actually be fulfilled and shipped.
Generating a Key
Click Create Key
In the API Keys section, click the + Create Key button in the top right.
Select Environment
Choose whether this key is for the Live or Test environment.
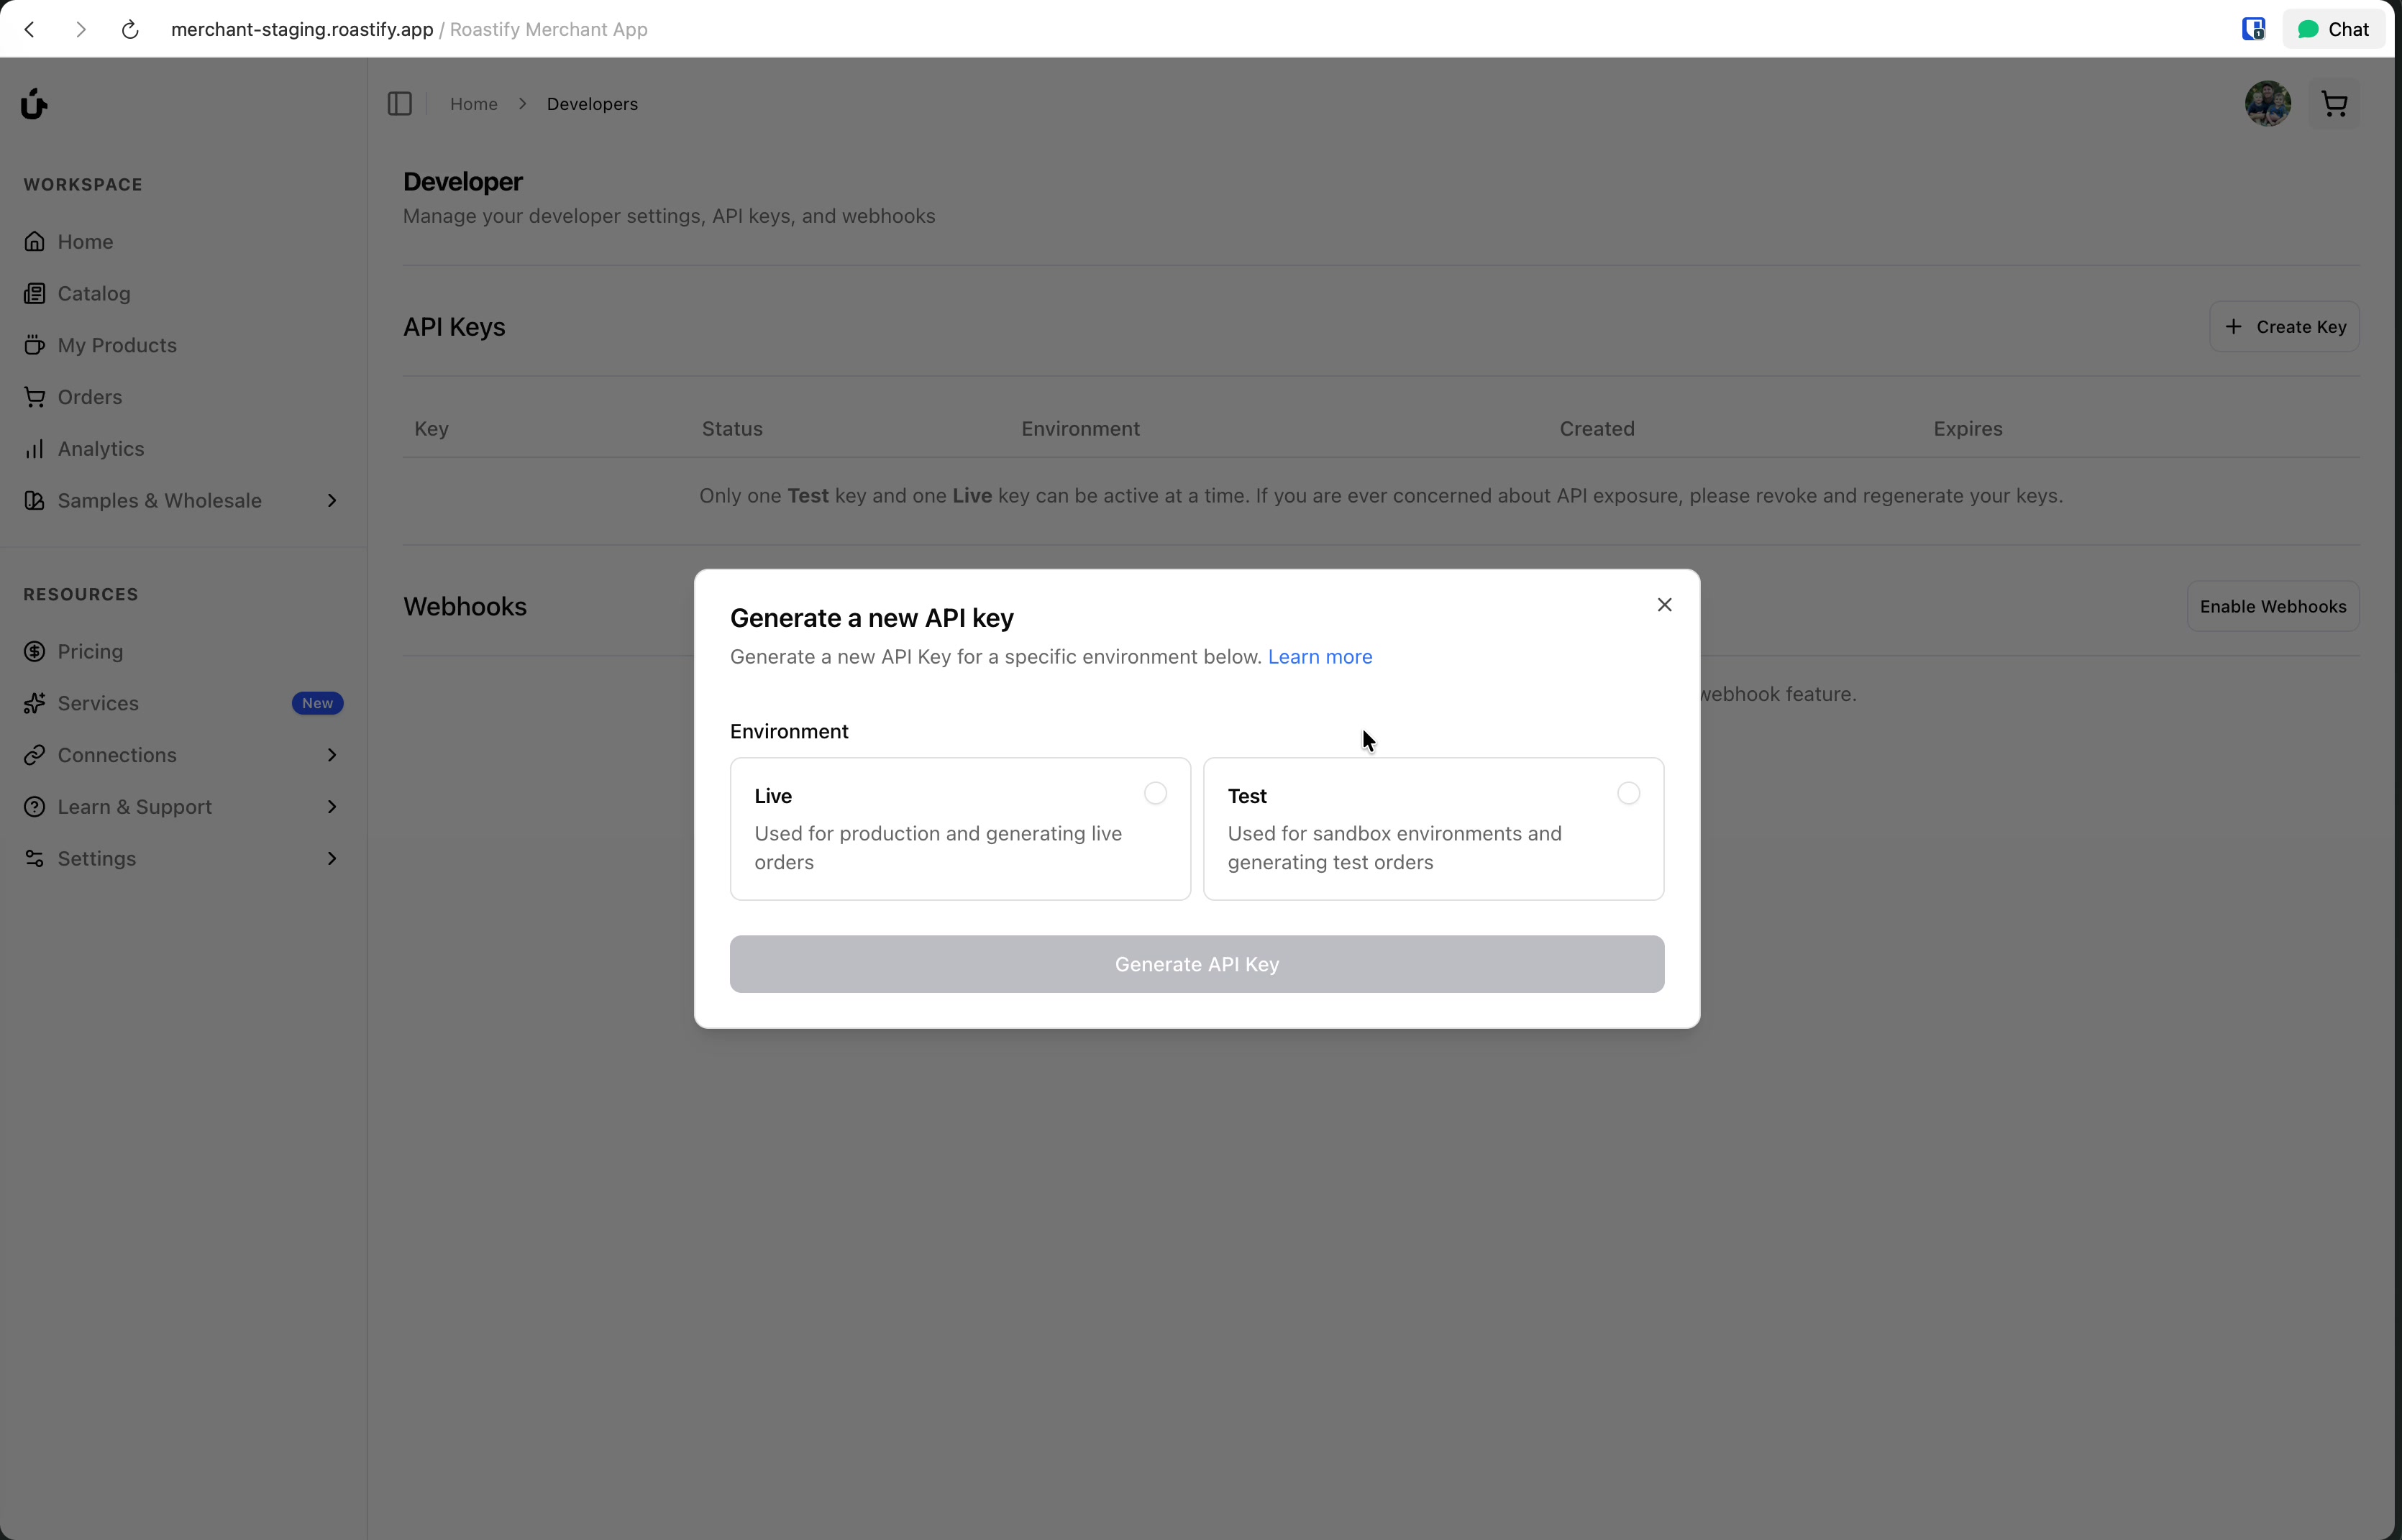
- Live - Used for production and generating live orders
- Test - Used for sandbox environments and generating test orders
For development, we recommend starting with a Test key.
Click Generate API Key
Click the button to generate your new API key.
Copy Your Key Immediately
After generation, you'll see a preview of your API key with options to reveal and copy it.
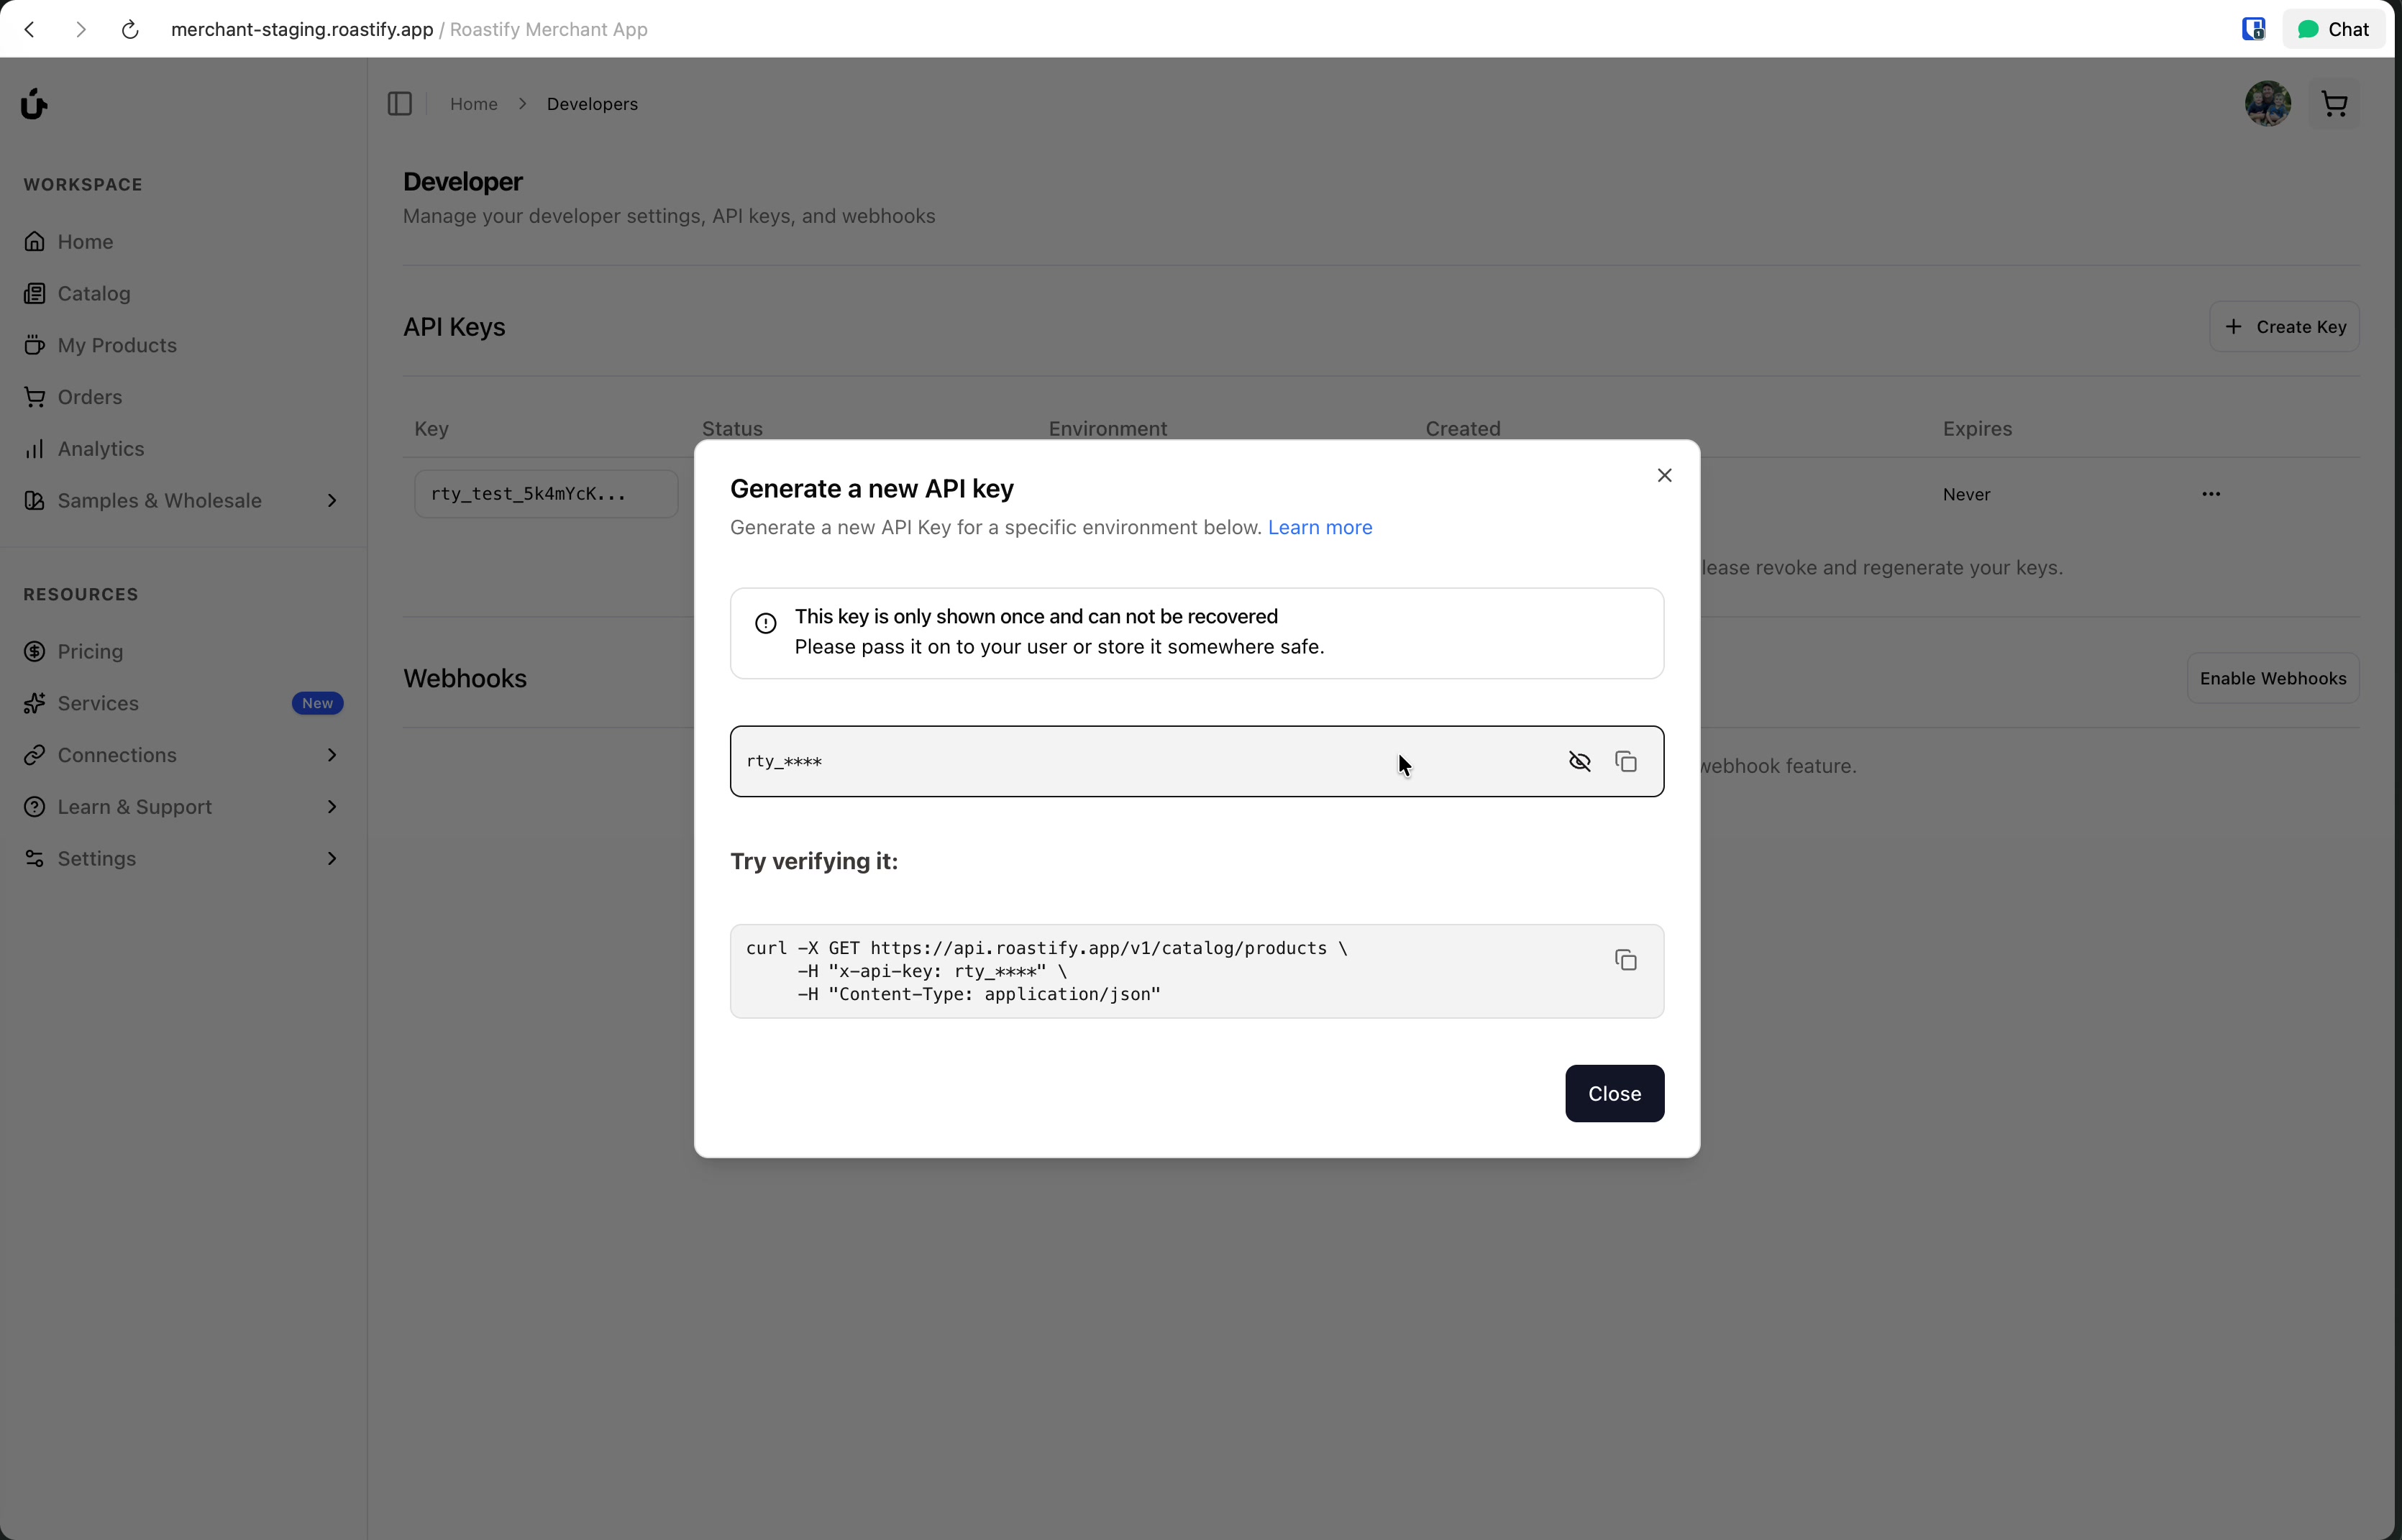
Important: This is your only opportunity to copy this key. Once you close this dialog, you won't be able to see the full key again. Store it somewhere safe immediately.
- Click the eye icon to reveal the full key
- Click the copy icon to copy it to your clipboard
- The dialog also shows a sample
curlcommand you can use to verify the key works
Close the Dialog
Once you've safely stored your key, click Close.
Key Security Best Practices
- Never commit API keys to version control (git, etc.)
- Use environment variables to store keys in your application
- Rotate keys regularly if you suspect they may have been compromised
- Use Test keys during development, only switch to Live for production
How we store your keys: Roastify never stores your API key in plain text. We store a sha256 hash of your key. When you make a request, we hash the provided key and compare it to the stored hash.
If you ever feel a key has been compromised or you lose it, simply delete the key and create a new one. It's better to be safe than sorry with API security.
Revoking and Replacing Keys
If you need to replace a compromised or lost key:
Revoke the Old Key
In the API Keys section, find your existing key and click the three-dot menu (⋯) on the right side. Select Revoke to immediately invalidate the key.
Generate a New Key
Click + Create Key and follow the steps above to generate a fresh key for the same environment.
Update Your Applications
Replace the old key with the new one in all applications and services that use it.
Revoking a key is immediate and permanent. Any applications using the revoked key will immediately stop working until updated with the new key.
Making Your First API Request
Now that you have an API key, you can make requests to the Roastify API.
Authentication
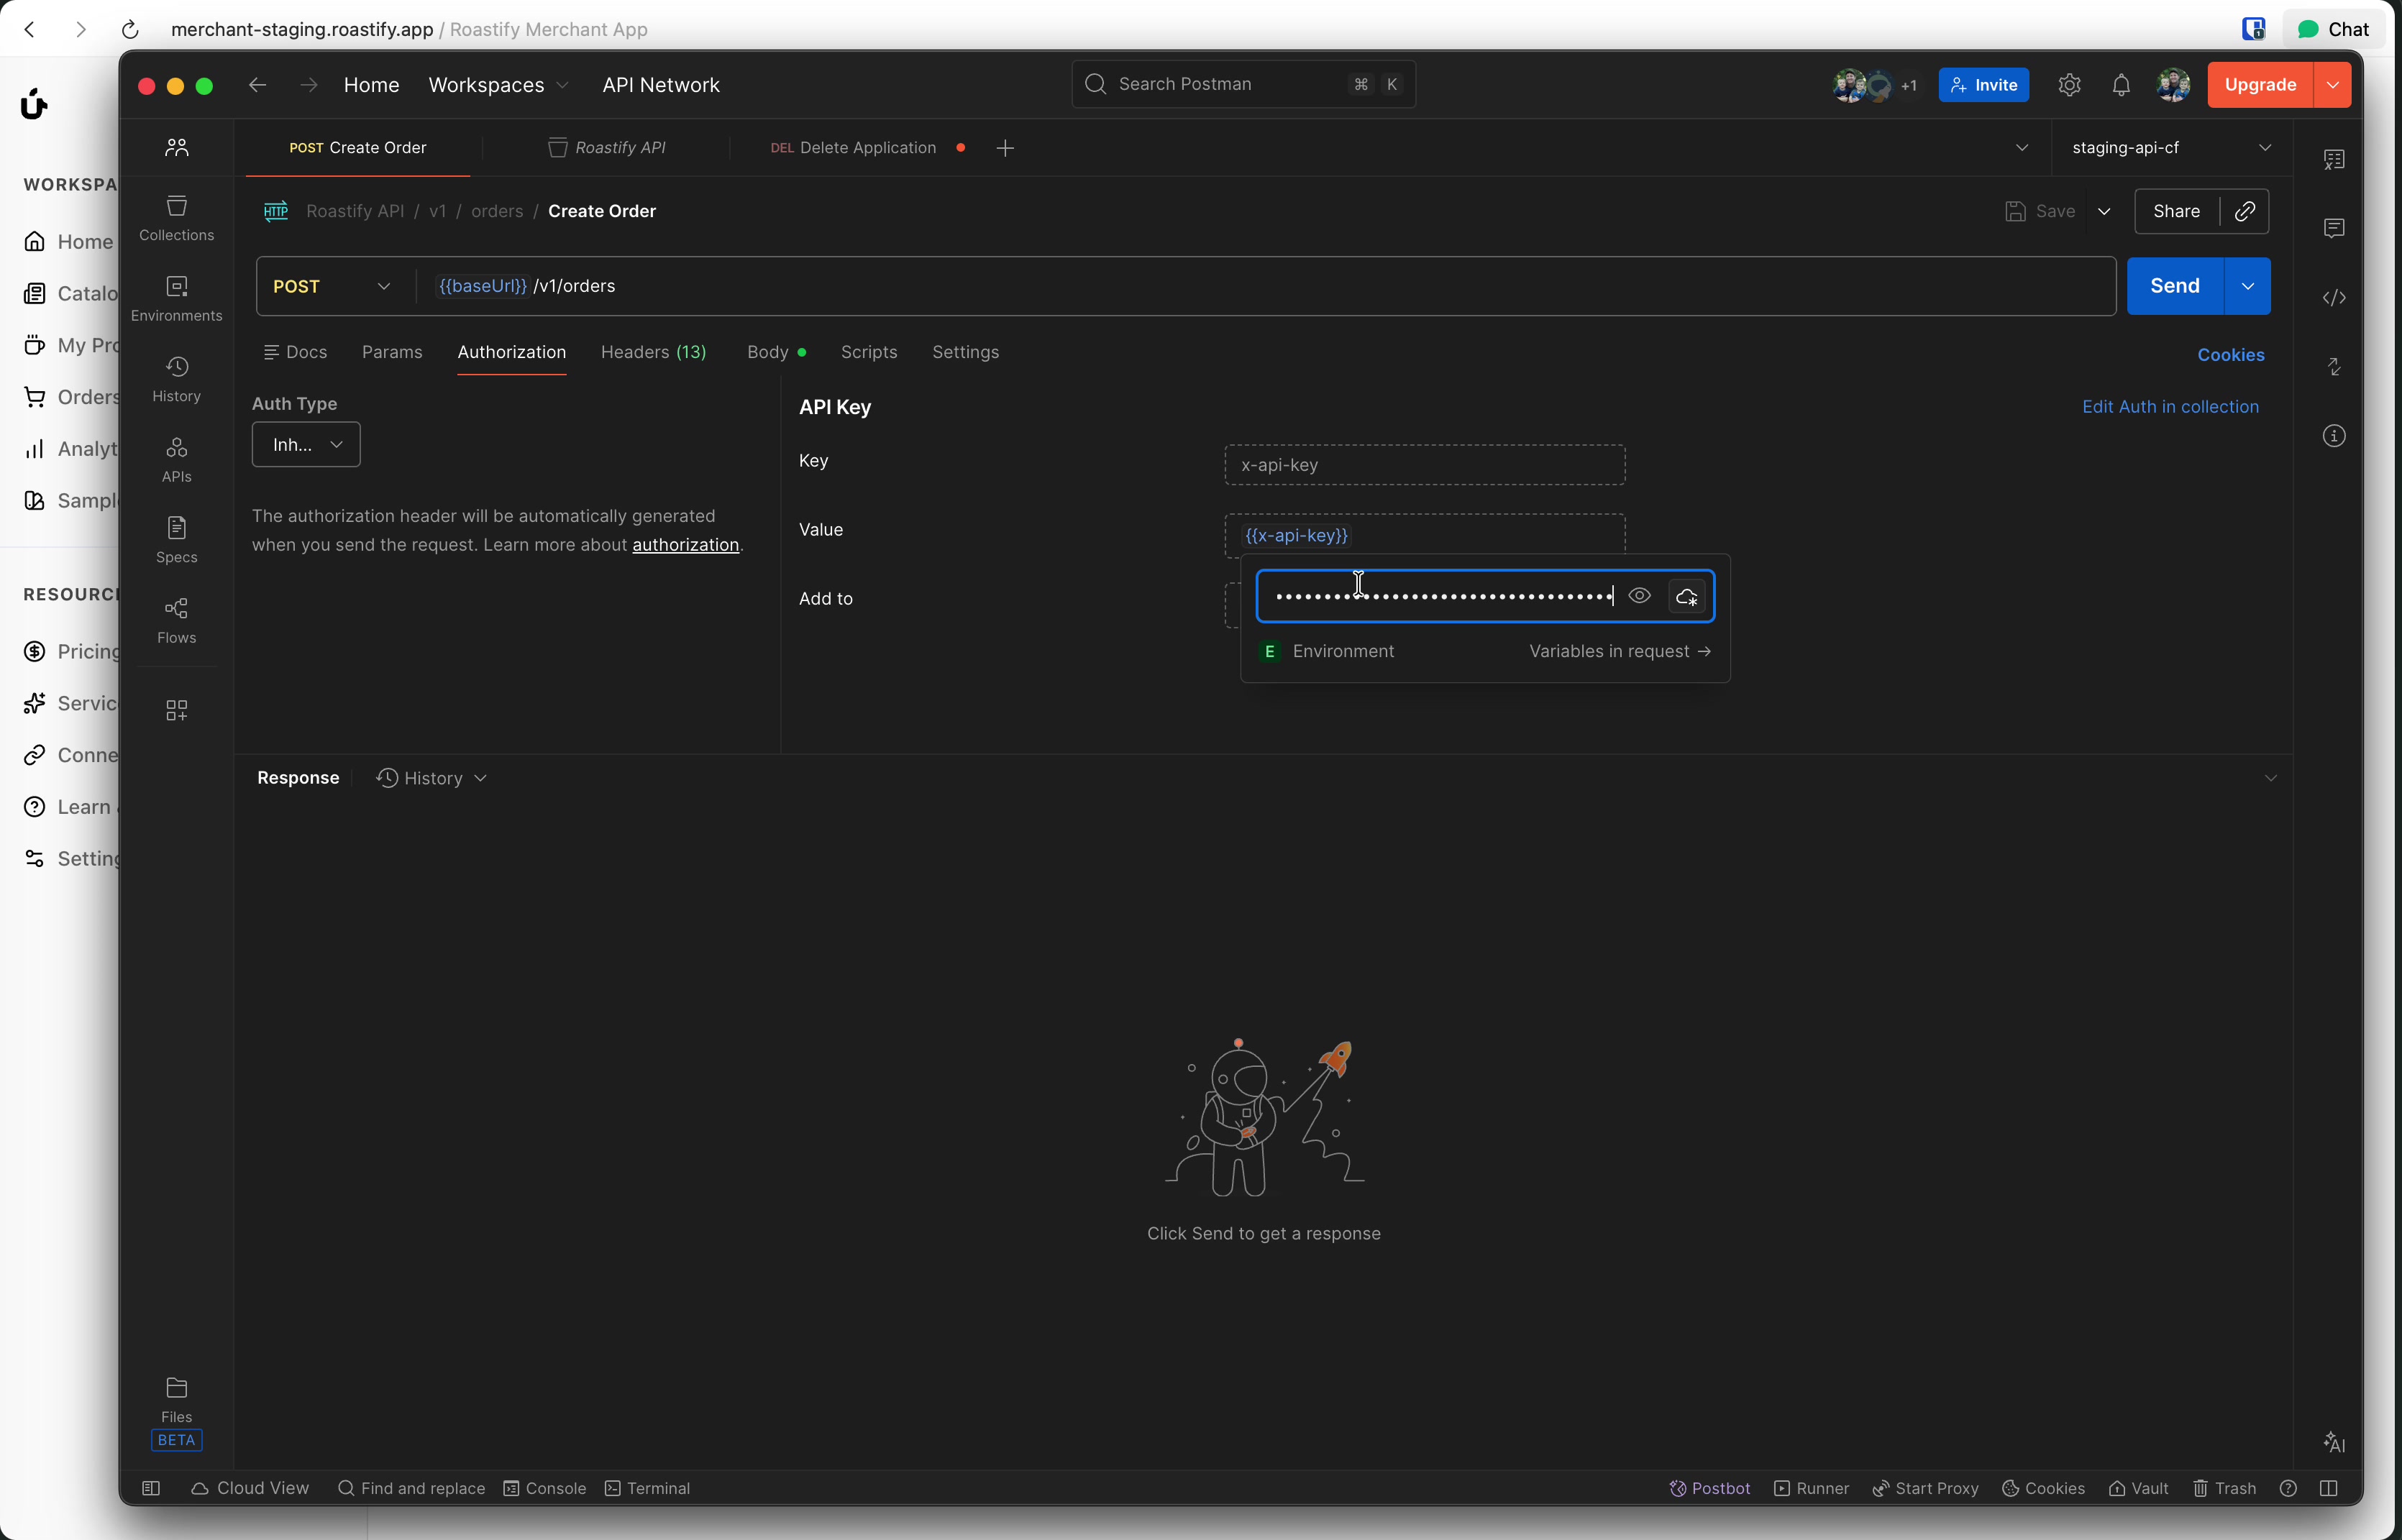
All API requests must include your API key in the x-api-key header:
curl -X GET https://api.roastify.app/v1/catalog/products \
  -H "x-api-key: rty_test_your_key_here" \
  -H "Content-Type: application/json"
Testing with Postman
Postman is a popular tool for testing APIs. Here's how to set it up:
Create a New Request
Open Postman and create a new GET request.
Set the URL
Enter the endpoint URL: https://api.roastify.app/v1/catalog/products
Add the API Key Header
Go to the Headers tab and add:
- Key:
x-api-key - Value: Your API key (e.g.,
rty_test_5k4mYcK...)
Send the Request
Click Send and you should receive a JSON response with your catalog products.
Example: Get Catalog Products
Request:
GET https://api.roastify.app/v1/catalog/productsResponse:
[
  {
    "id": "clyd67824rn3f78g0f8j9",
    "title": "12oz Coffee Box",
    "description": "Custom-printed 12oz coffee box",
    "imageUrl": "https://storage.roastify.app/catalog/coffee-box.jpeg",
    "productType": "CoffeeBox12oz",
    "productCategory": "Coffee",
    "dielineTemplateUrl": "https://cdn.roastify.app/templates/coffee-box.png",
    "variants": 8,
    "plan": "base"
  }
]
Example: Create an Order
Request:
POST https://api.roastify.app/v1/orders
Content-Type: application/json
x-api-key: rty_test_your_key_here

{
  "toAddress": {
    "name": "John Doe",
    "street1": "123 Main St",
    "city": "Austin",
    "state": "TX",
    "zip": "78701",
    "country": "US",
    "email": "john@example.com"
  },
  "items": [
    {
      "sku": "COF-WHB-12O-COL-BOX",
      "artworkUrl": "https://example.com/artwork.jpg",
      "quantity": 2
    }
  ]
}
Response:
{
  "orderId": "ord_abc123"
}
Remember: Orders created with a Test API key will not be fulfilled. They're for testing your integration only.
Setting Up Webhooks
Webhooks allow you to receive real-time notifications when events occur in your Roastify account, such as when an order is shipped or tracking information is updated.
To set up webhooks:
- On the Developers page, click Enable Webhooks
- Add an endpoint URL where you want to receive POST requests
- Select which events to subscribe to (e.g.,
fulfillment.shipped,tracking.updated) - Use the Testing tab to send test events and verify your setup
Security Critical: Each endpoint has a unique Signing Secret. Always verify webhook signatures to ensure you're only accepting events from Roastify.
Webhooks Documentation
For complete details on setting up webhooks, testing endpoints, event payloads, signature verification, and troubleshooting, see our dedicated Webhooks Guide →
Complete Workflow Example
Here's a complete example of using the API with webhooks:
Create an Order via API
POST https://api.roastify.app/v1/orders
x-api-key: rty_test_your_key

{
  "toAddress": {
    "name": "John Doe",
    "street1": "123 Main St",
    "city": "Austin",
    "state": "TX",
    "country": "US",
    "zip": "78701",
    "email": "john@example.com"
  },
  "items": [
    {
      "sku": "COF-WHB-12O-COL-BOX",
      "artworkUrl": "https://example.com/artwork.jpg",
      "quantity": 1
    }
  ]
}
Response includes the orderId.
Query Order Status
GET https://api.roastify.app/v1/orders/{orderId}
x-api-key: rty_test_your_key
Returns current order status and details.
Receive Webhook Updates
As the order progresses, you'll receive webhooks:
fulfillment.created- Order entered fulfillmentfulfillment.picked- Items prepared for productionfulfillment.packaged- Order packagedfulfillment.shipped- Order shipped (includes tracking)tracking.updated- Tracking status changes
Troubleshooting
Next Steps
API Reference
Explore all available endpoints and parameters. View API Reference →
Webhooks Guide
Deep dive into webhook events and payloads. Webhooks →
API Introduction
Learn about rate limits, pagination, and more. Introduction →