Syncing Products to Shopify
You can easily push your Roastify products to your integrations (Shopify store) using the Roastify app. This guide walks you through the process, from product creation to syncing, fulfillment, and removal.1. Create a Product in Roastify
First, create your product in Roastify as usual.See our Create a Product guide for step-by-step instructions.
2. Open Manage Integrations
After your product is created, click on the product in the products page.Select Manage Integrations to see available integrations.
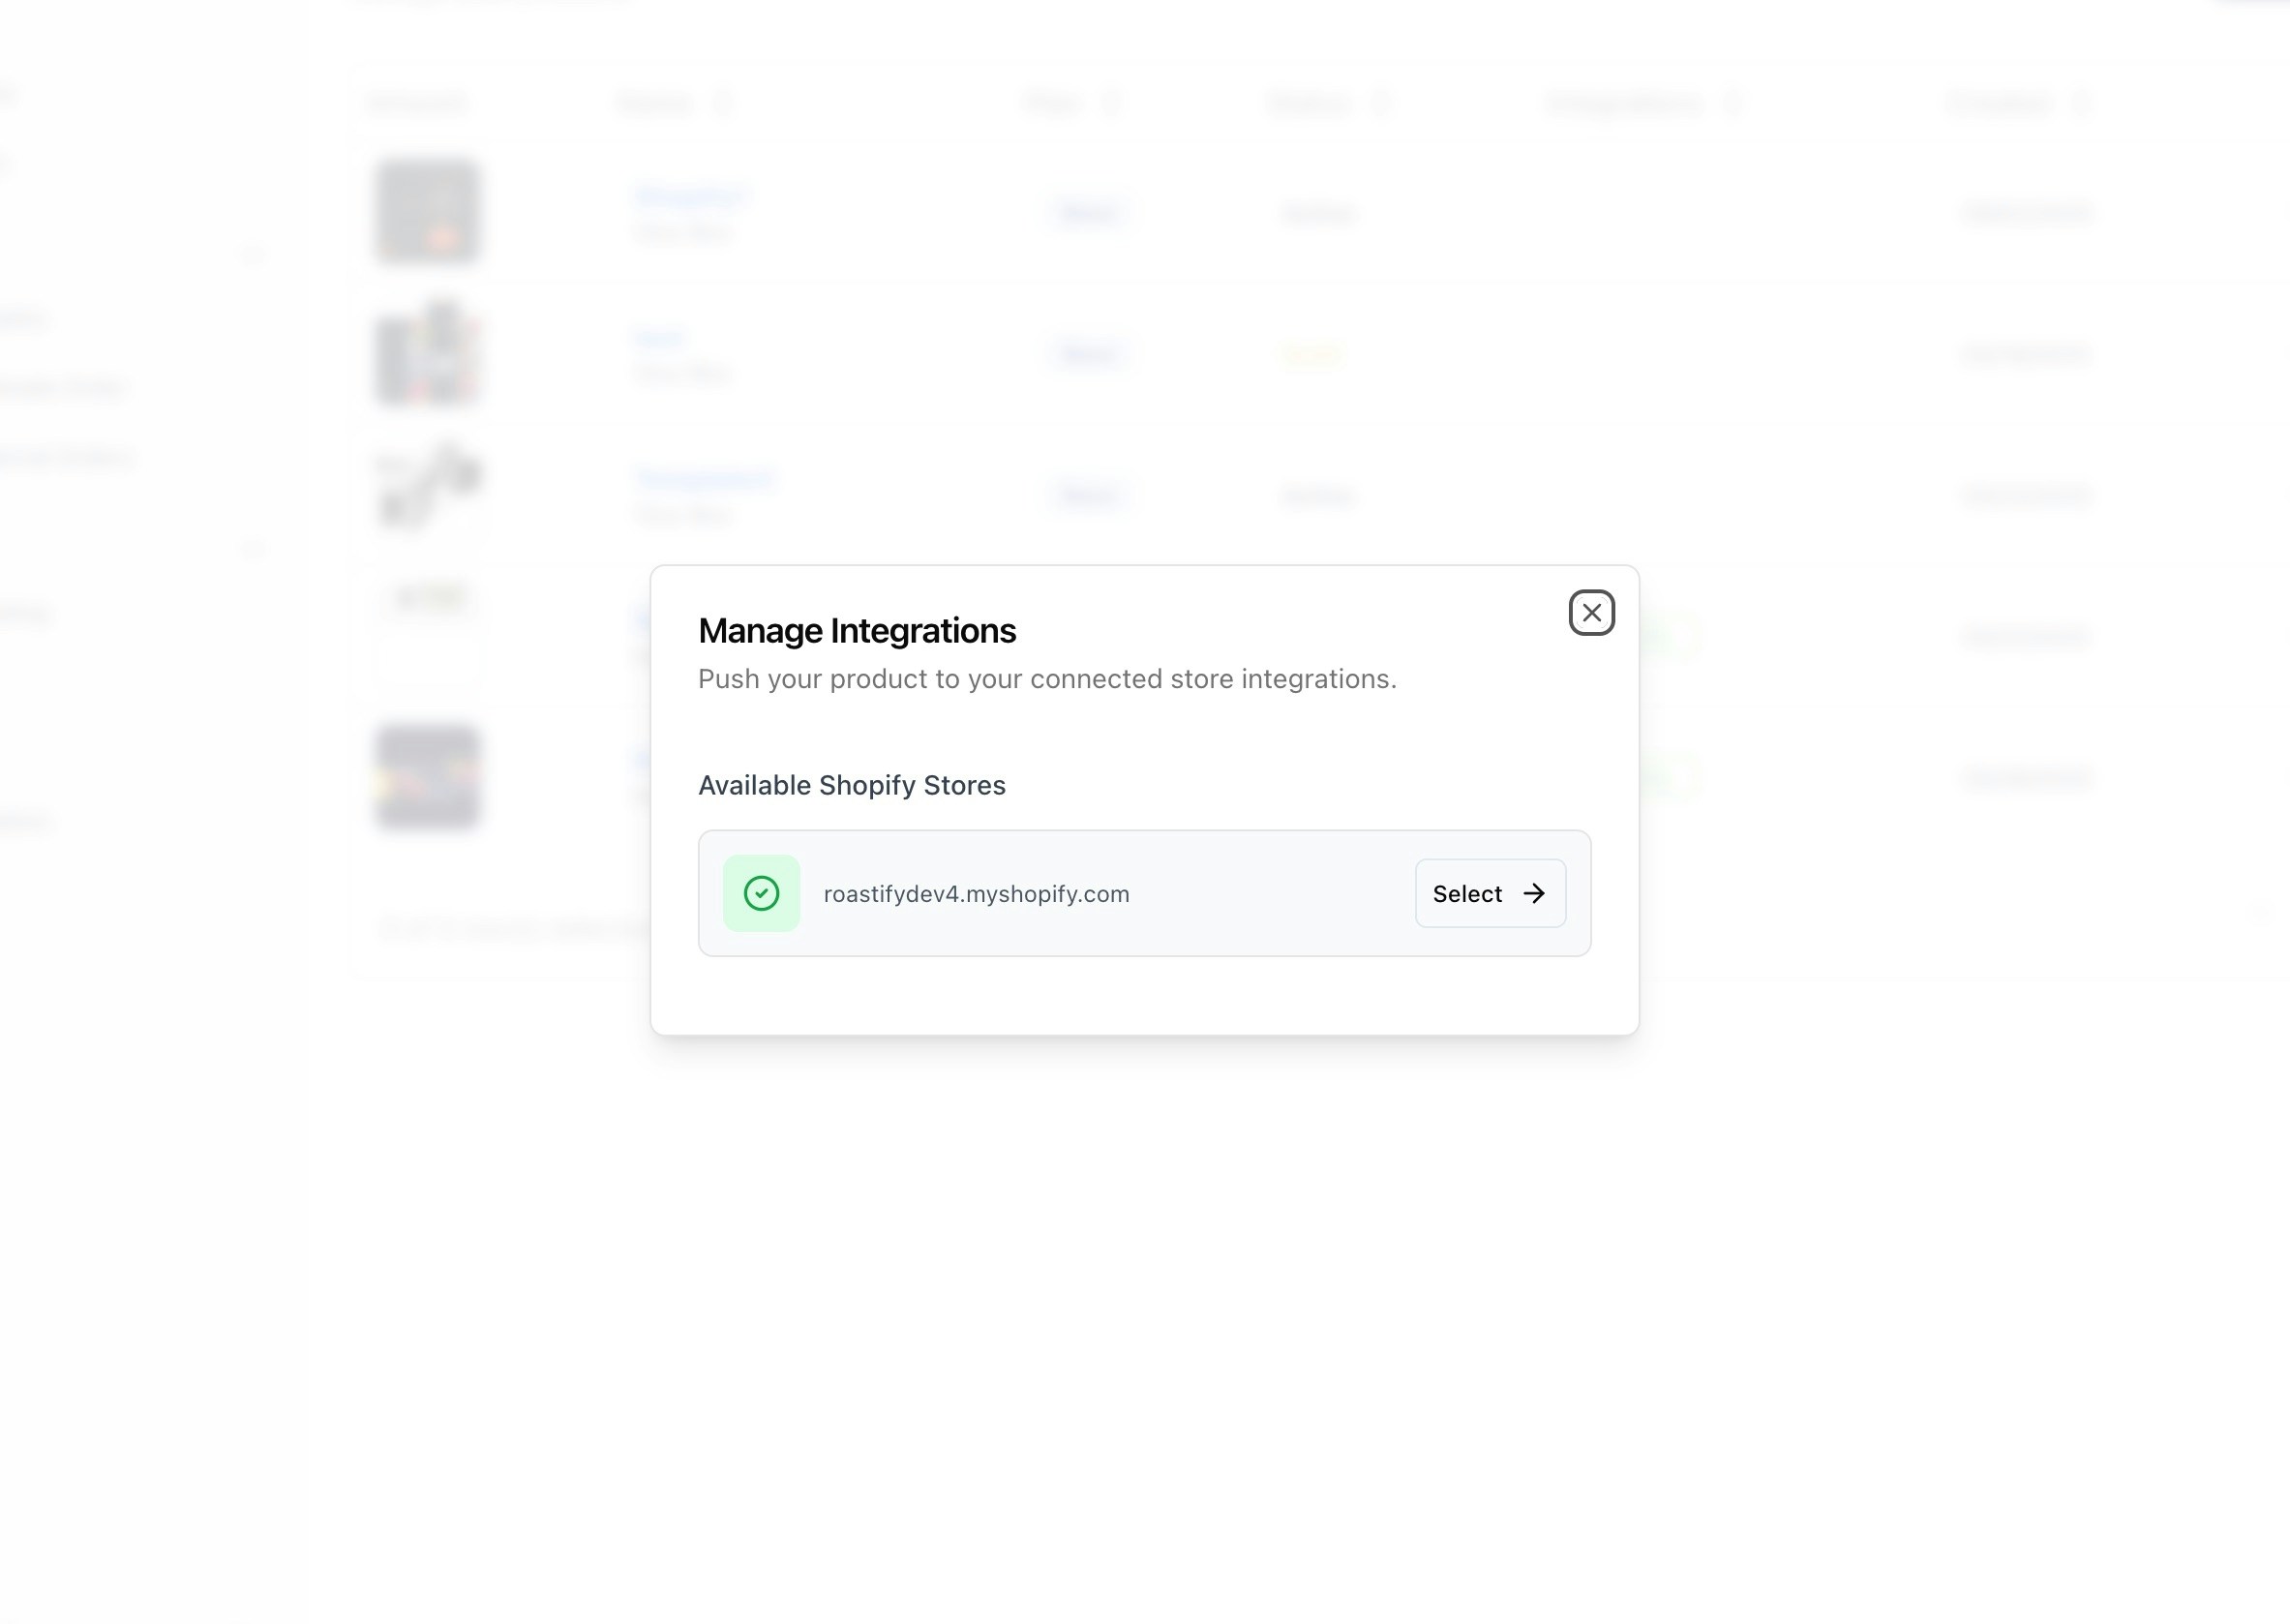
3. Select Your Shopify Store
If you have already connected an integration, you’ll see your available integrations. Select the integration you want to sync your product to.4. Confirm Pricing
You’ll be prompted to confirm your retail price and shipping for the integration.Adjust as needed, then continue.
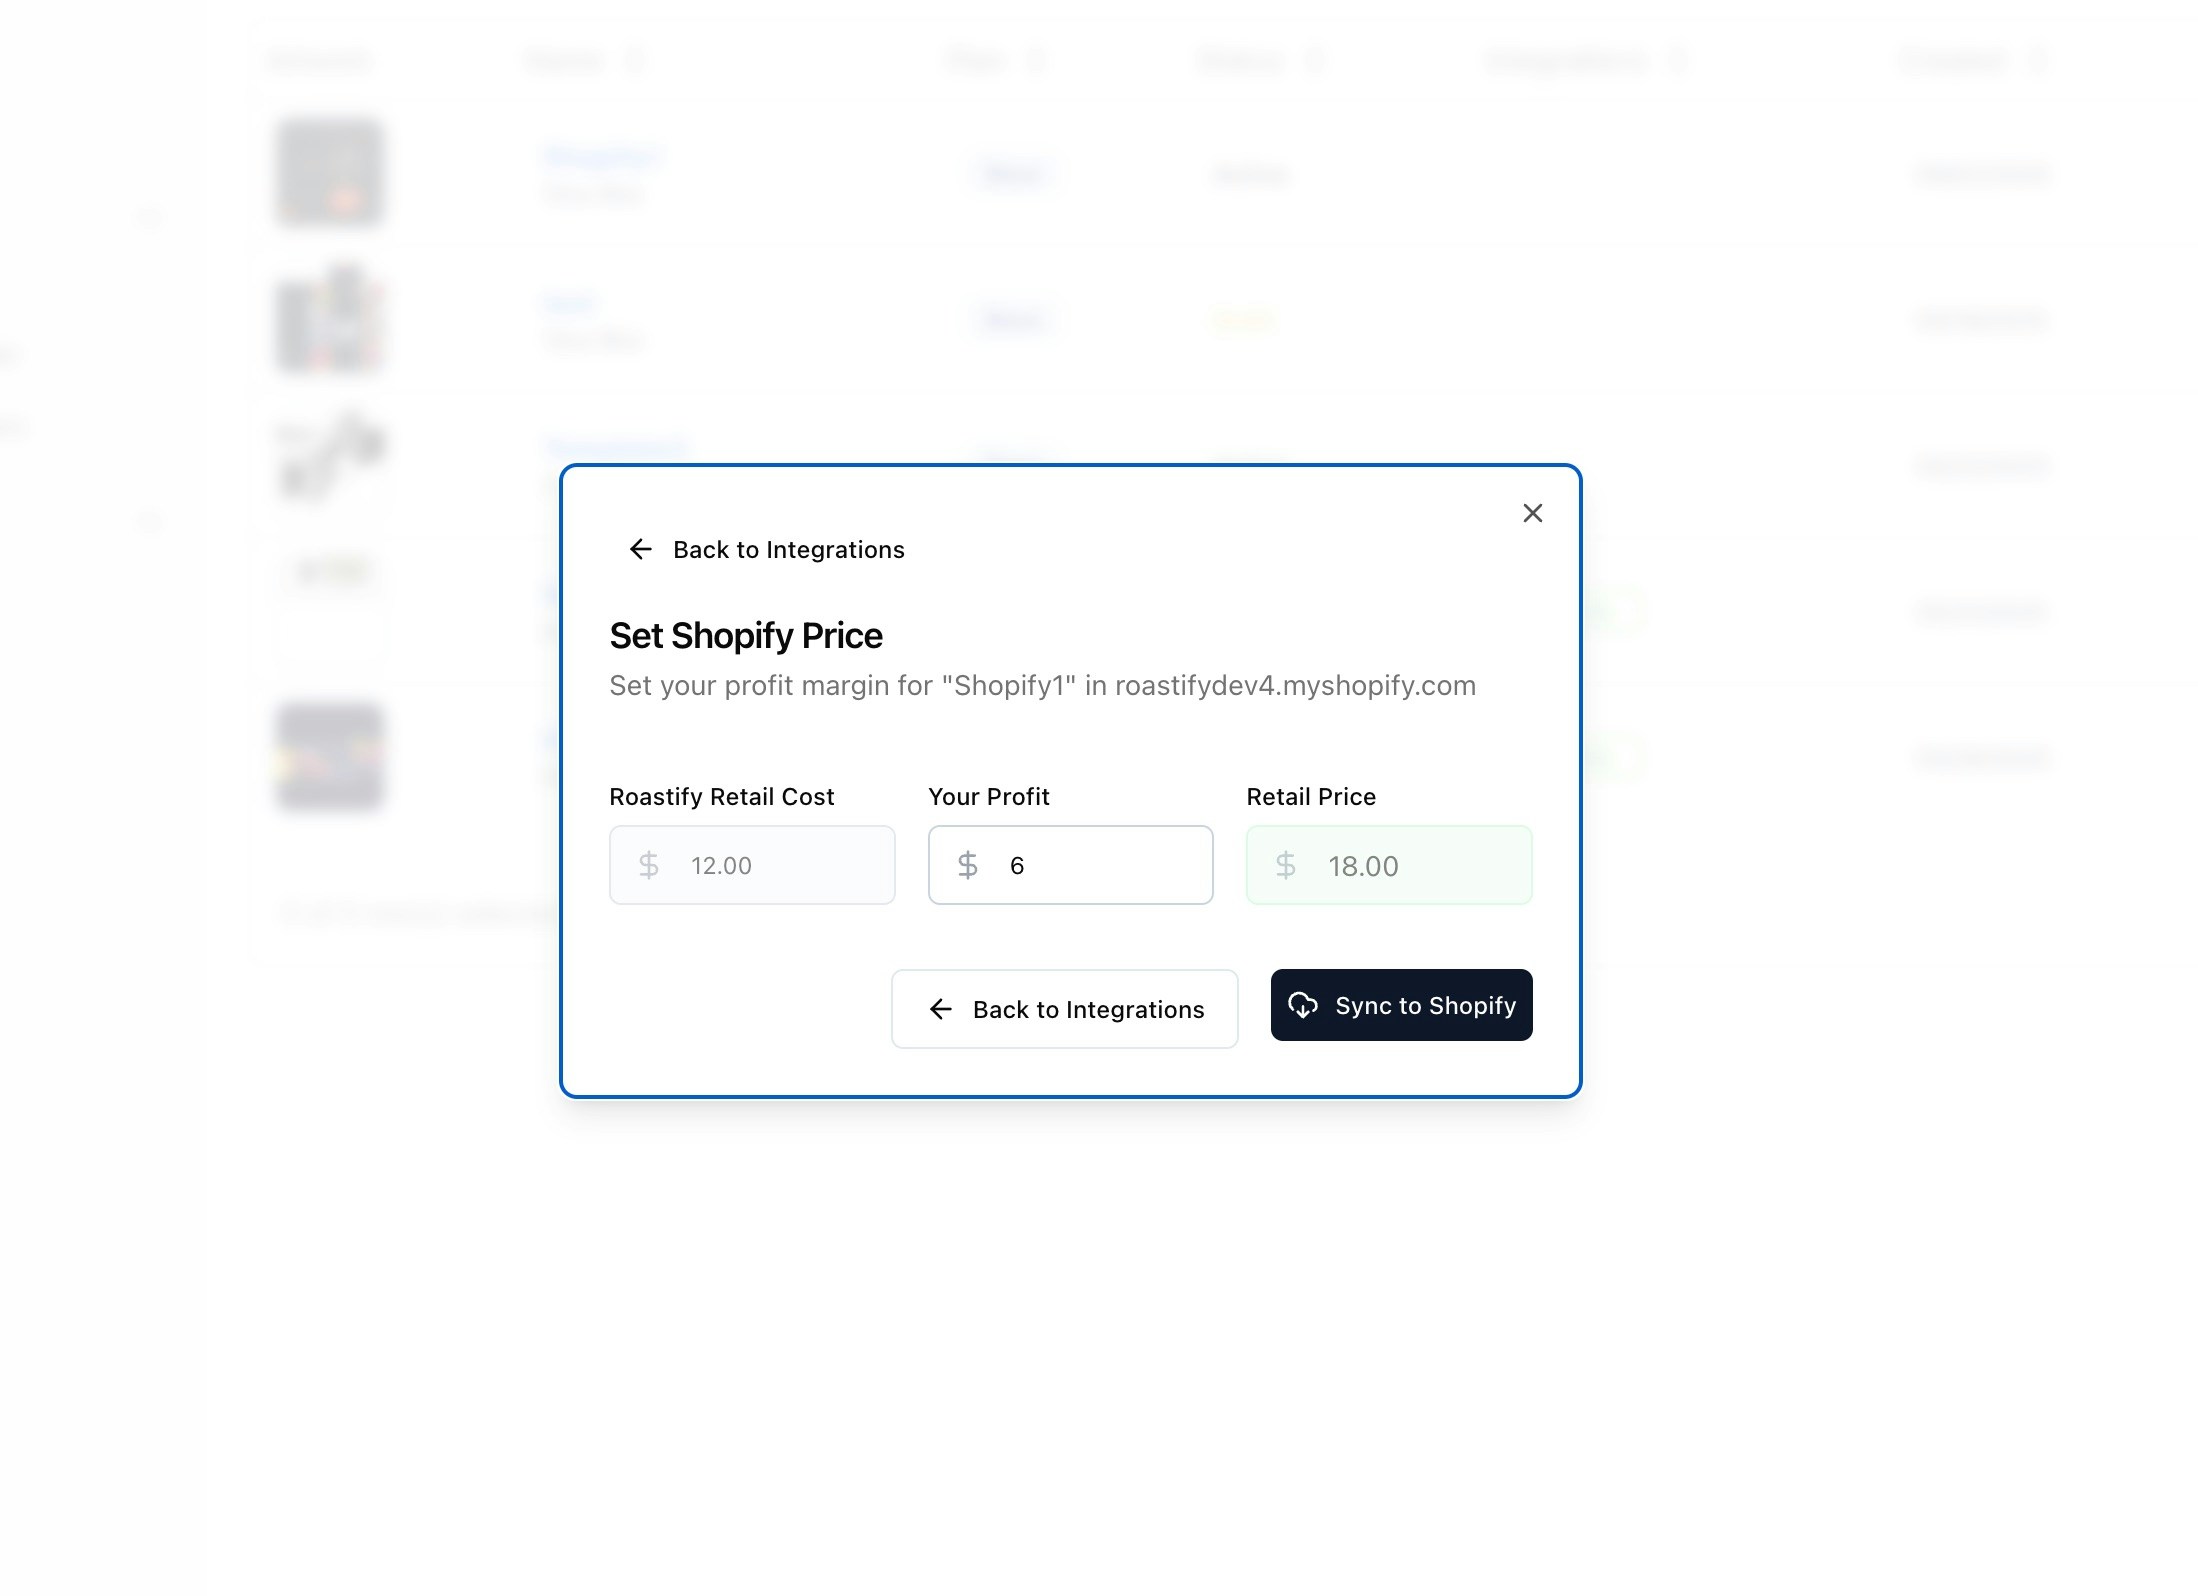
5. Sync to Shopify
Click Sync to Shopify.Roastify will create the product in your Shopify store.
6. Review and Activate in Shopify
Your product will appear in your Shopify admin in Draft status.Review the product details, make any final edits, and set the product to Active when you’re ready to sell.
Products are created as Draft in Shopify to give you a chance to review and edit before they go live.
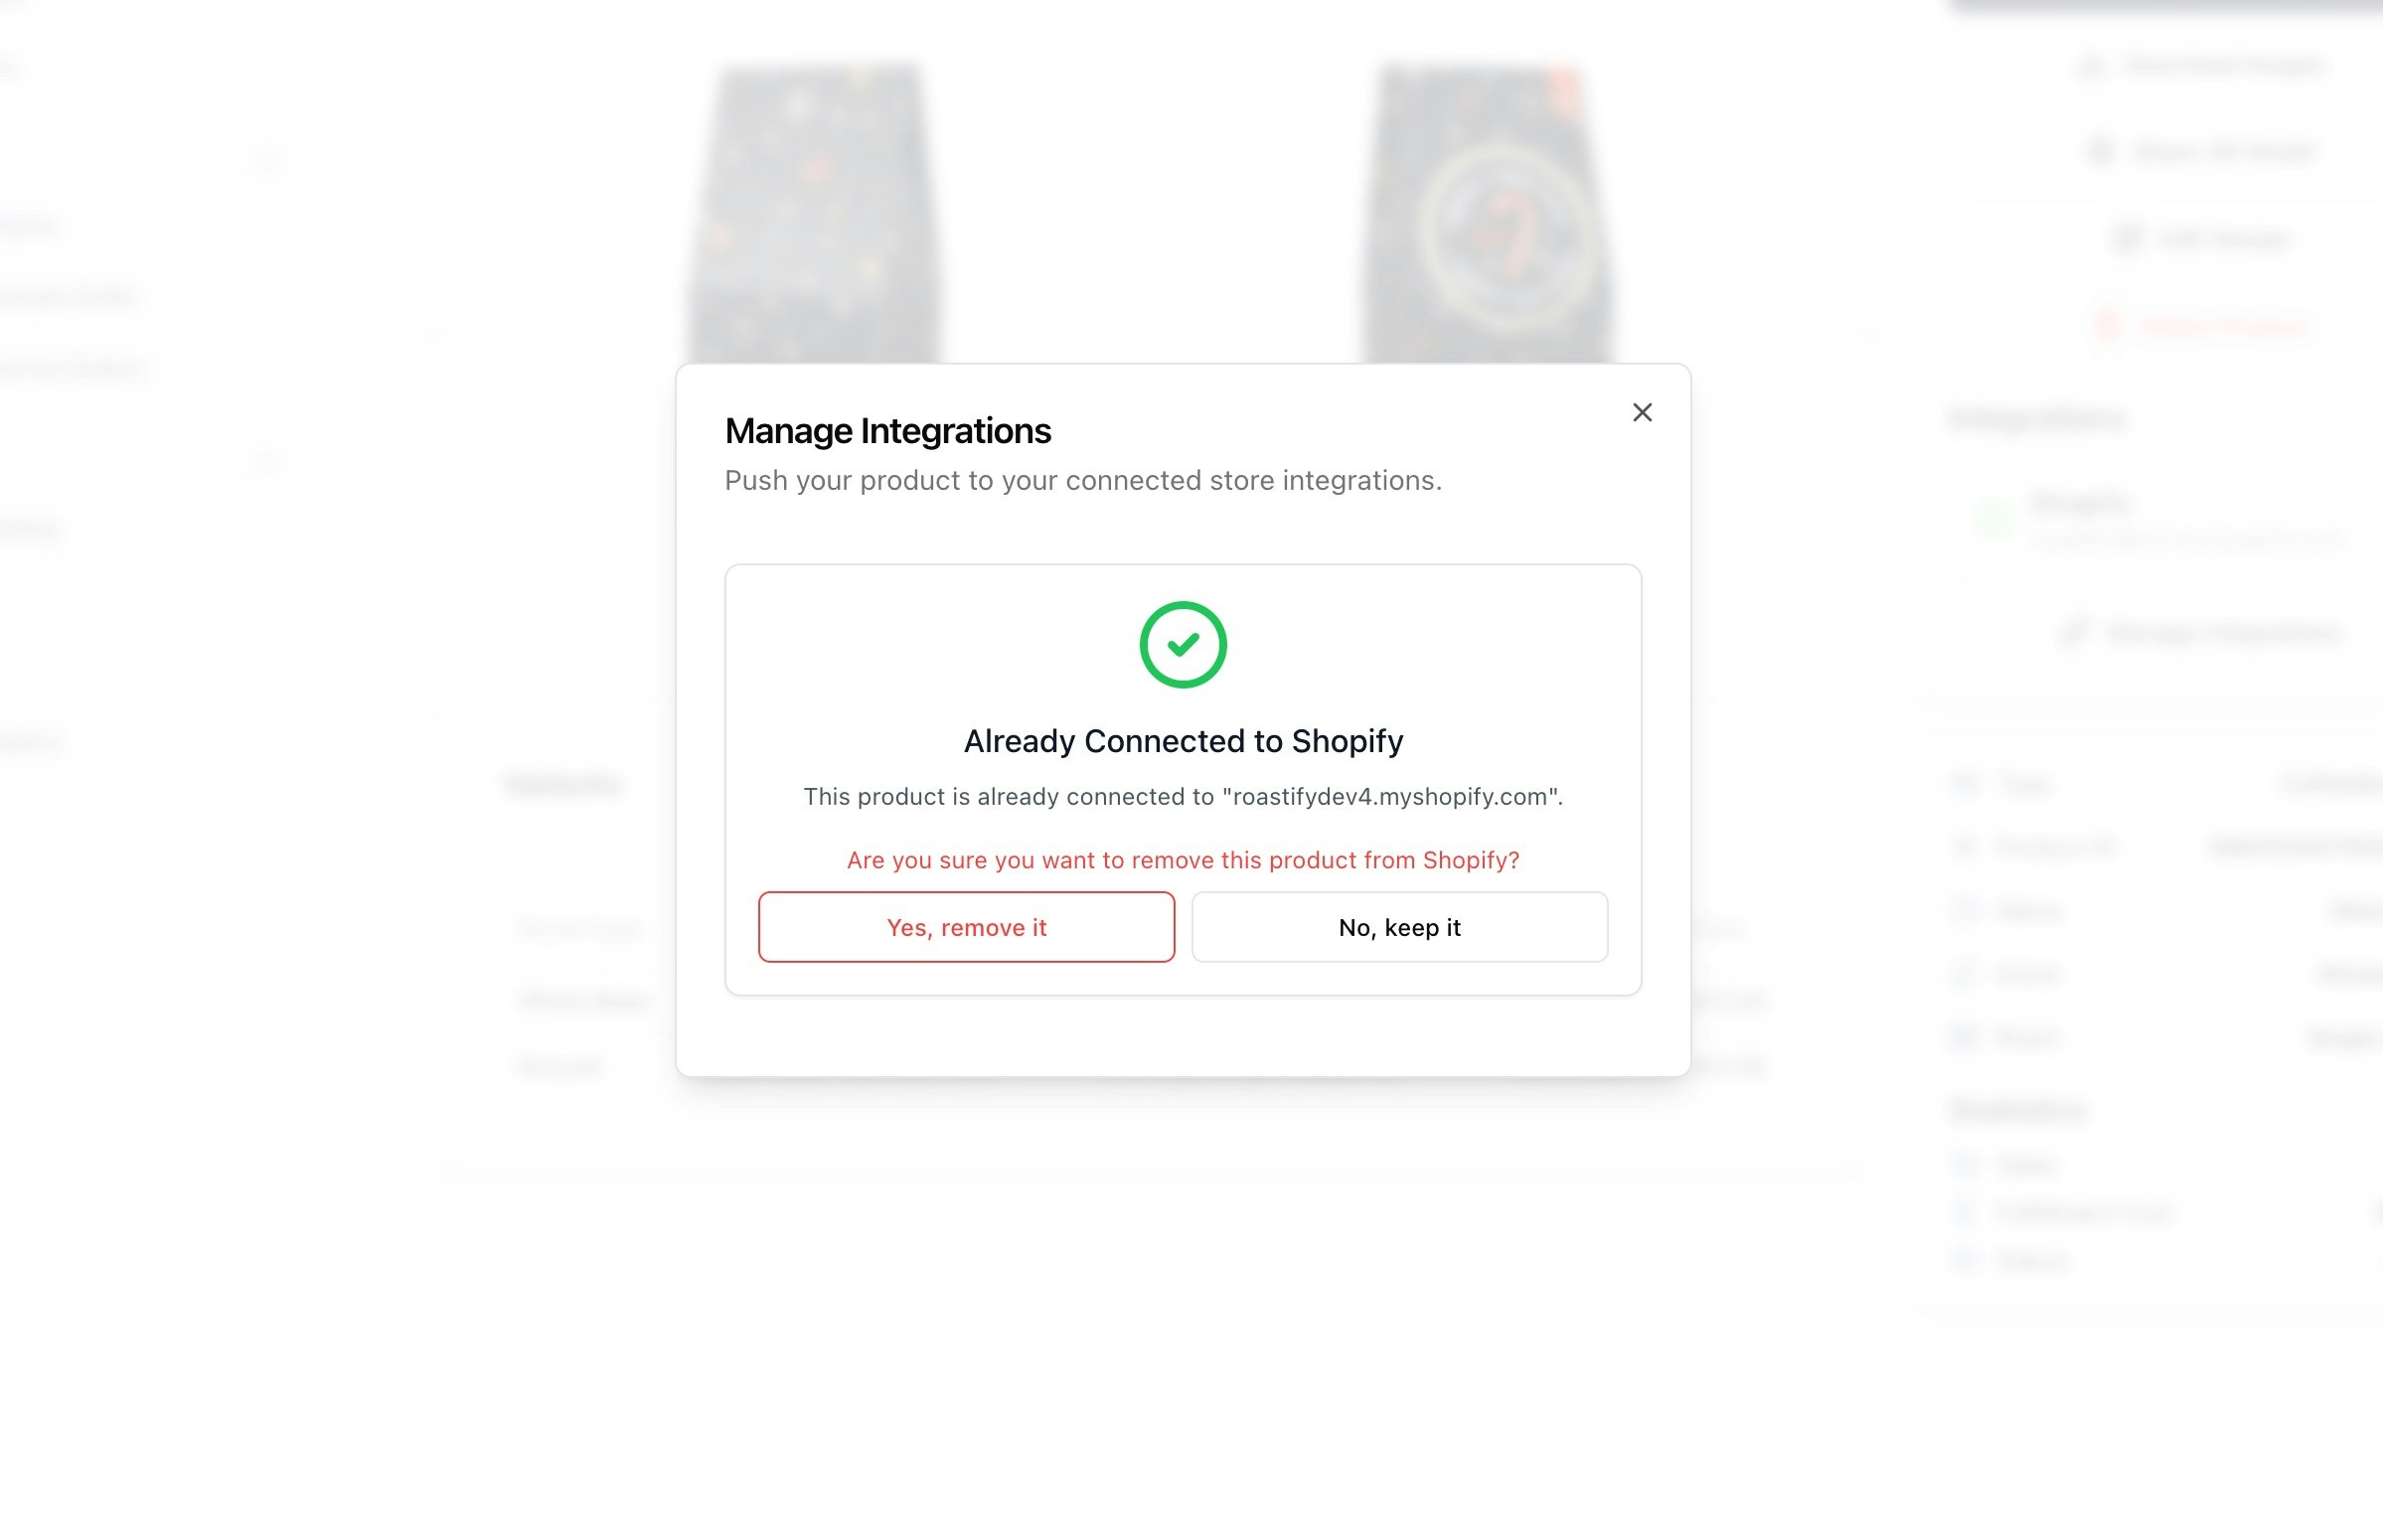
7. Remove a Product from Shopify
To remove a product from Shopify:- Go to the product in the products page.
- Select Manage Integrations.
- Select the integration you want to remove the product from.
- Click Remove Product from Integration.
Understanding Product Removal vs. Deletion
There are two different ways to remove products, and they work differently:Remove from Integration
Where: Product page → Manage Integrations → Remove
What happens: Product is deleted from your Shopify store, but stays in your Roastify account
Use when: You want to temporarily remove from Shopify or stop selling there
What happens: Product is deleted from your Shopify store, but stays in your Roastify account
Use when: You want to temporarily remove from Shopify or stop selling there
Delete from Roastify
Where: Product page → Delete button
What happens: Product is permanently deleted from Roastify AND automatically removed from all connected integrations
Use when: You no longer want this product anywhere
What happens: Product is permanently deleted from Roastify AND automatically removed from all connected integrations
Use when: You no longer want this product anywhere
How Fulfillment Works with Shopify
When you sync products to Shopify, Roastify handles all the order fulfillment automatically. Here’s what happens behind the scenes:Automatic Location Assignment
What it does: Roastify is automatically set as the fulfillment location for your products
Why it matters: This tells Shopify that Roastify will handle inventory and shipping for these products
Where to check: Shopify Admin → Products → [Your Product] → Variants → Inventory
Why it matters: This tells Shopify that Roastify will handle inventory and shipping for these products
Where to check: Shopify Admin → Products → [Your Product] → Variants → Inventory
Instant Order Processing
What it does: When a customer places an order, Roastify receives it and begins processing immediately
Why it matters: Fast processing means customers get their coffee faster
Timeline: Most orders are validated and sent to production within 1 minute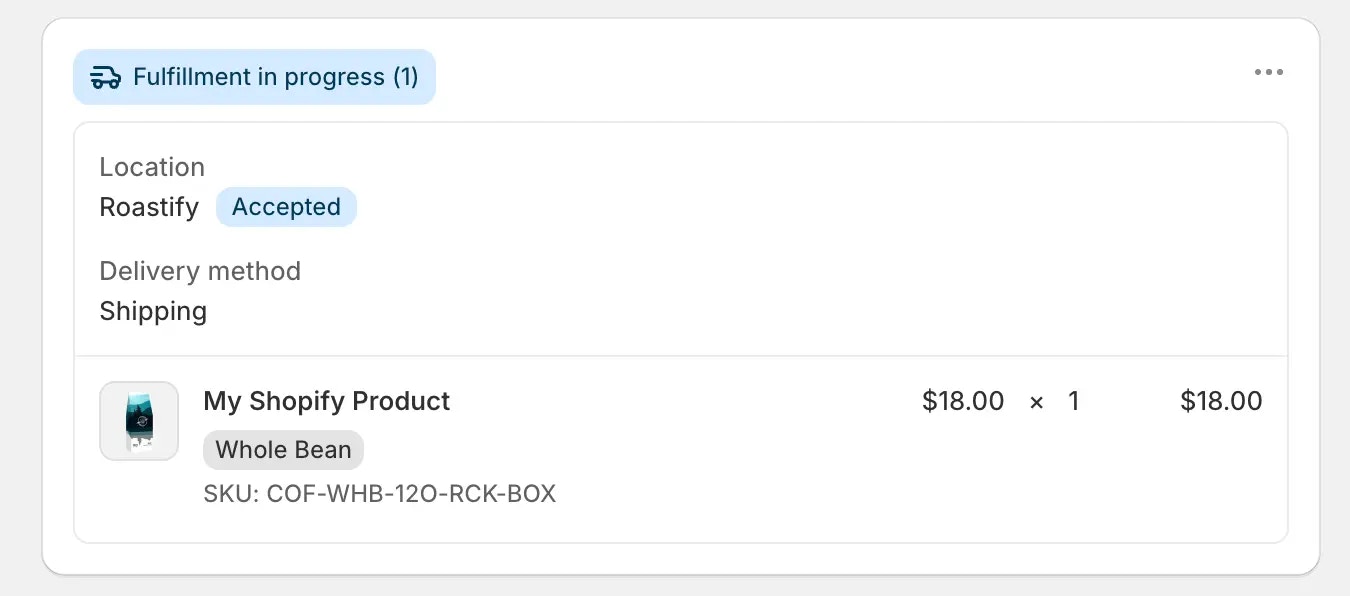
Why it matters: Fast processing means customers get their coffee faster
Timeline: Most orders are validated and sent to production within 1 minute
Required Shopify Setting: Enable Auto-Fulfillment
For seamless order processing, you need to enable one setting in your Shopify store. This is required for Roastify to process orders automatically.Why this matters: Without this setting, orders will sit in “pending fulfillment” status and won’t be sent to Roastify for processing.
1
Open Shopify Settings
In your Shopify admin, navigate to Settings → Checkout (or Settings → General on older Shopify versions).
2
Find Order Processing Section
Scroll down to the Order Processing section on the settings page.
3
Enable Auto-Fulfillment
Check the box for “Automatically fulfill the order’s line items”
This allows Roastify to receive and process orders immediately when customers place them.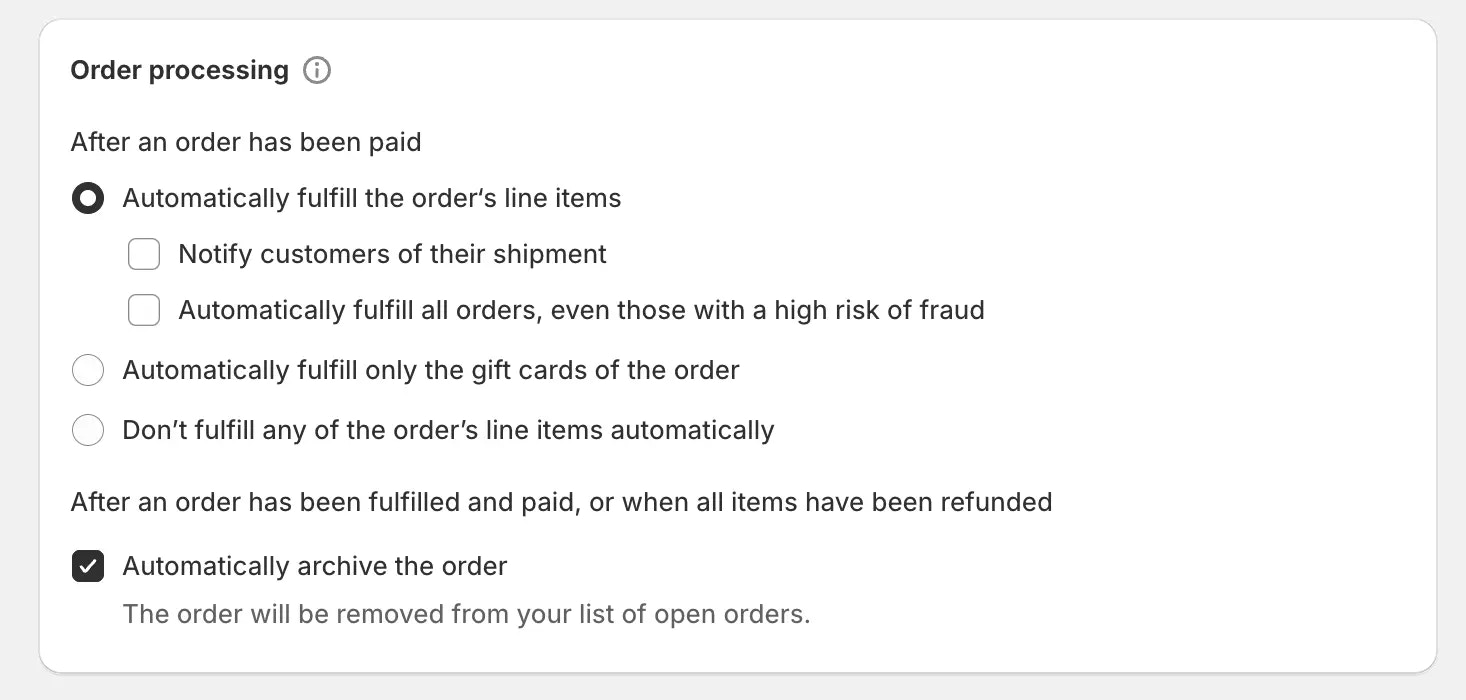
This allows Roastify to receive and process orders immediately when customers place them.
4
Save Changes
Click Save to apply the setting. Your Shopify store is now ready to work seamlessly with Roastify!
Need Help?
Contact our support team for assistance with any integration issues.