

Connect Shopify to Roastify
Install the app, publish your first product, and turn on automatic fulfillment in Shopify.
You need a Shopify admin account, an active Roastify Base or Pro subscription, and a Roastify fulfillment payment method. Create and save at least one product design before publishing.
1. Connect the correct accounts
Open the Roastify Shopify app listing, select the intended Shopify store, and complete installation and the Roastify account connection. In Roastify Integrations, confirm that the correct store appears.
If it does not, check the Shopify store and Roastify account identities before reinstalling, especially if you have open orders.
2. Publish a product
- Open My Products in Roastify.
- Open the saved product's actions and choose Manage Integrations.
- Select Shopify, set the profit amount, and review the retail price.
- Choose Sync to Store.
- Open the resulting draft product in Shopify. Review the title, description, images, price, variants, and shipping assignment, then make it active on the intended sales channel.
The displayed profit amount does not include every business cost. Account for shipping you absorb, processing fees, and discounts when choosing a price.
3. Preserve the connection
Keep the Roastify-generated variant SKUs unchanged. You can edit Shopify titles, descriptions, images, retail prices, and publication settings. Changing a storefront image does not change the packaging artwork in Roastify.
4. Check shipping and fulfillment
Set up shipping rates for the profile containing your Roastify products.
Shopify must send Roastify a fulfillment request for the connected items. Turn on automatic fulfillment to send that request when an order is paid.
Turn on automatic fulfillment
- In your Shopify admin, open Settings.
- Select General and scroll down to Order processing.
- Under After an order has been paid, select Automatically fulfill the order's line items.
- Click Save.
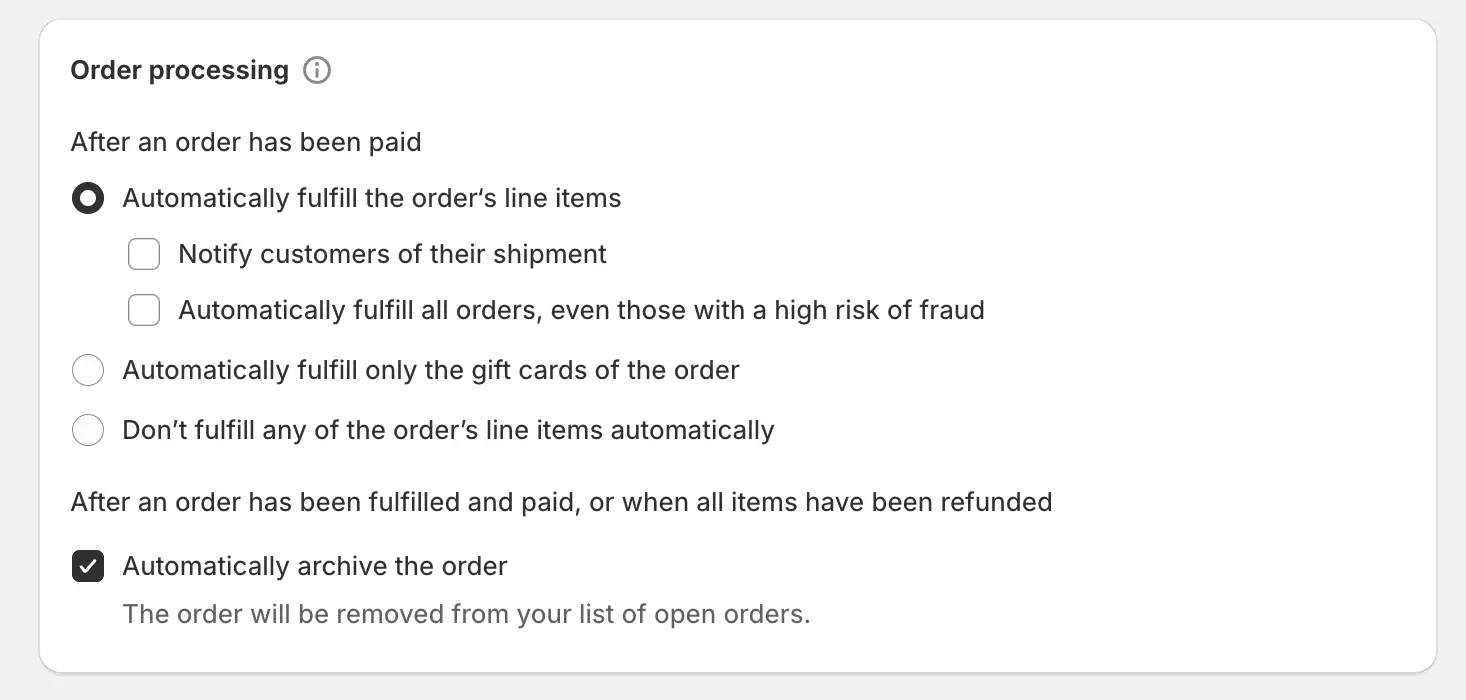
This is a store-wide setting. If you also pack and ship products yourself, use manual fulfillment requests for the Roastify items instead. Review other suppliers' requirements before changing their order flow.
If you capture Shopify payments manually, capture payment before automatic fulfillment can start. The notification, high-risk-order, and archive options shown in the screenshot are separate settings.
Shopify also documents these controls in its order-processing guide.
Confirm Roastify received the request
After the first customer order, find it in Roastify Orders. If it is missing, check the order flow before retrying or making a replacement order.
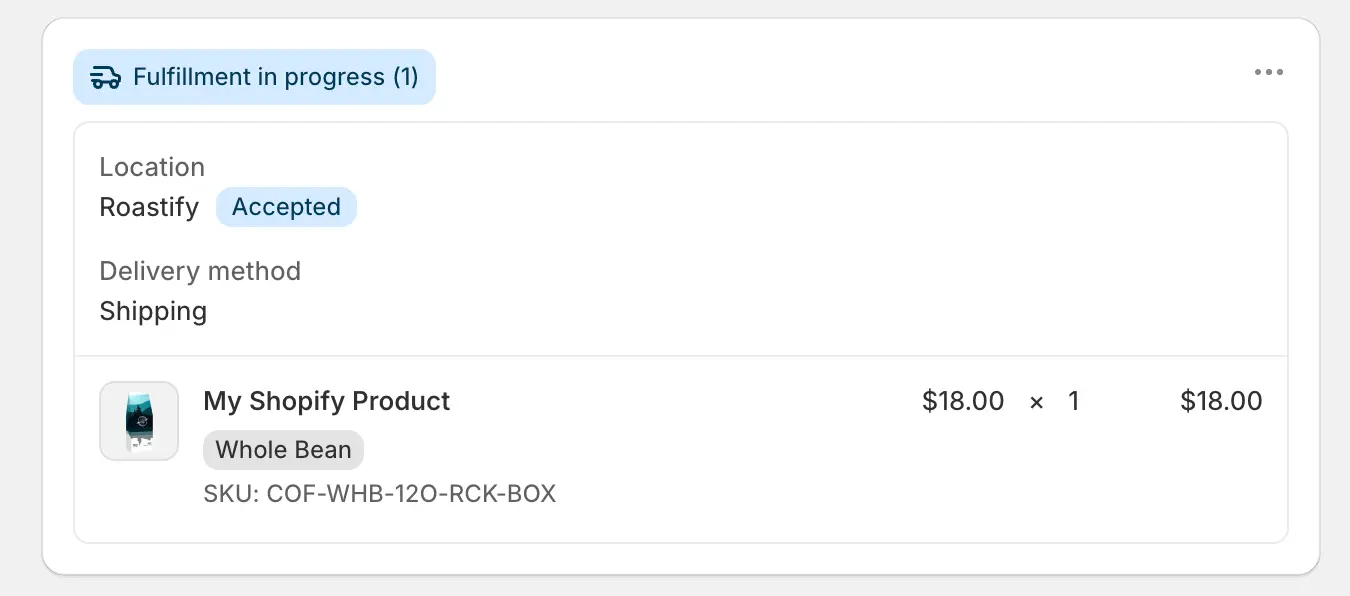
Enabling automatic fulfillment is not confirmation that an older unfulfilled order was sent. Check that order's request status and Roastify Orders separately. Sending a request can start a real fulfillment charge and production; simply marking an order fulfilled yourself does not send it to Roastify.